Stuffed eggs are my secret weapon for turning a simple, nostalgic snack into something a bit more chaotic and fun. I love how they’re portable, perfect for picnics or spontaneous get-togethers, where messiness is part of the charm. It’s like taking the classic deviled egg and giving it a playful, hands-on twist that everyone can dig into with fingers.
What makes this recipe special is that it invites a little chaos—no delicate spooning, no perfect piping. Just scoop, stuff, and maybe get a little messy. It’s a way to bring a little more personality to a familiar dish, especially when you want to keep things casual but still crave that satisfying, creamy bite. Plus, it’s a great way to use up those leftover eggs without fuss.
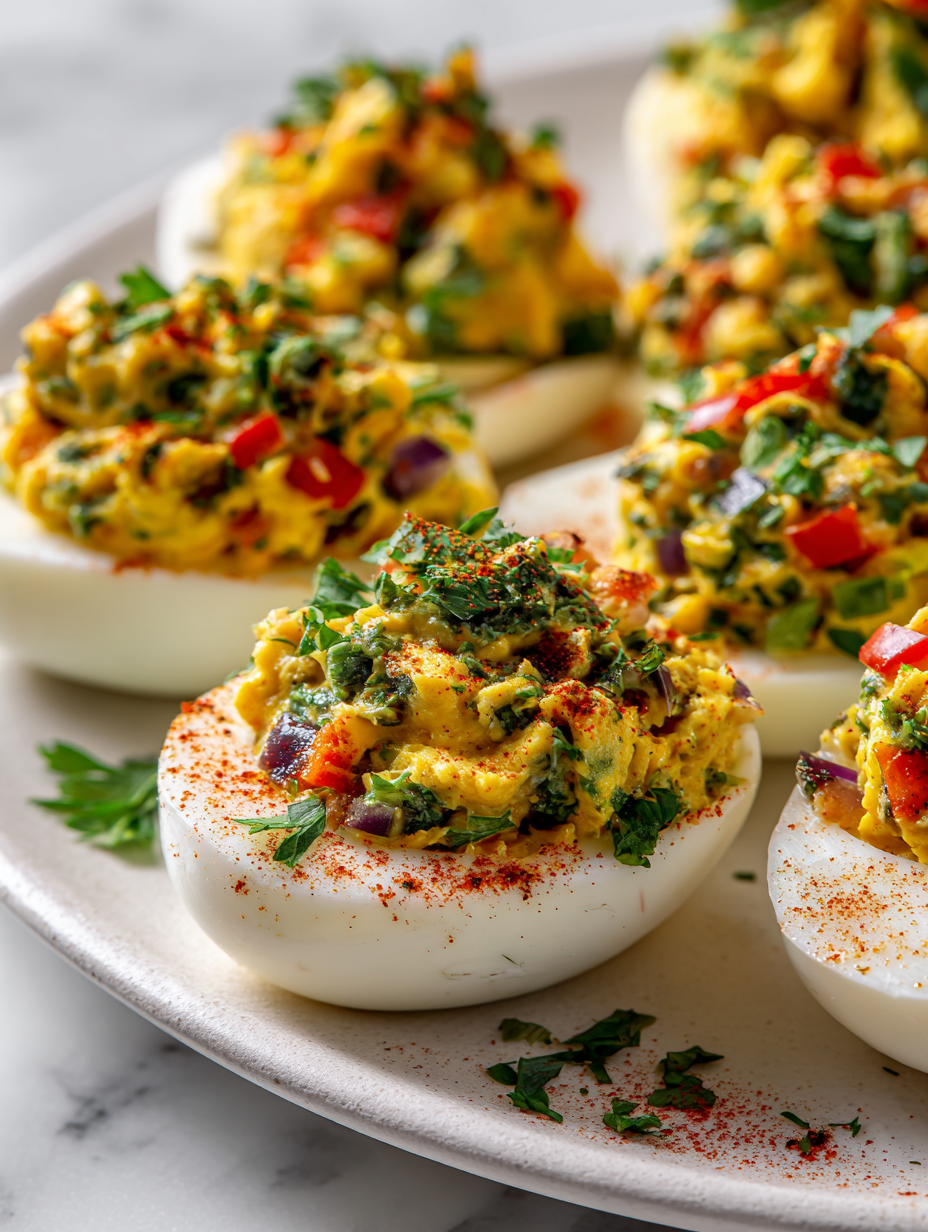
This recipe takes a nostalgic twist by transforming classic deviled eggs into a portable, messy-eating finger food perfect for picnics or casual gatherings, blending tradition with a playful, hands-on approach.
The story behind this recipe
- This recipe was born out of a lazy weekend afternoon when I found a dozen eggs in the fridge and a craving for something familiar but with a twist. I started messing around with different fillings, and suddenly, stuffed eggs felt like the perfect way to turn leftovers into a fun, messy snack. It’s become my go-to for casual gatherings because everyone loves getting their hands dirty a little.
- I remember making these for a picnic years ago, watching friends laugh as they tried to keep their fingers clean. That chaotic, joyful moment stuck with me. Now, I make them whenever I want a quick, satisfying bite that’s more playful than polished. It’s a reminder that simple ingredients can turn into a little celebration, no fancy fuss needed.
- heading: ‘The story behind this recipe’
Key Ingredients Breakdown
- Eggs: I prefer large, fresh eggs—they peel easier and have a richer flavor. If yours are a bit older, add a splash of vinegar to the boiling water to help peel.
- Mayonnaise: I use good-quality mayo for creaminess, but Greek yogurt works if you want a tangier, lighter filling. Adjust salt accordingly.
- Dijon Mustard: Adds a sharp kick that balances the richness. Skip if you want milder flavor, but don’t skip the zing.
- Pickle Relish: I love the sweet-tangy crunch it gives. If you prefer less sweetness, reduce the relish or chop fresh pickles instead.
- Paprika: For that smoky, mild heat on top. Smell it before sprinkling—fresh paprika has a vibrant aroma that hints at smoky depth. Try smoked paprika for more punch.
- Chives or Green Onions: I toss these in for a mild onion hit and a splash of color. If you’re out, fresh parsley or dill can add a similar brightness.
- Salt & Pepper: Always taste the filling before stuffing. A pinch of salt and a grind of pepper make all the difference to bring out the flavors.
Spotlight on key ingredients
Eggs:
- I prefer large, fresh eggs—they peel easier and have a richer flavor. If yours are a bit older, add a splash of vinegar to the boiling water to help peel.
- Mayonnaise: I use good-quality mayo for creaminess, but Greek yogurt works if you want a tangier, lighter filling. Adjust salt accordingly.
- Dijon Mustard: Adds a sharp kick that balances the richness. Skip if you want milder flavor, but don’t skip the zing.
Herbs & Seasonings:
- Pickle Relish: I love the sweet-tangy crunch it gives. If you prefer less sweetness, reduce the relish or chop fresh pickles instead.
- Paprika: For that smoky, mild heat on top. Smell it before sprinkling—fresh paprika has a vibrant aroma that hints at smoky depth. Try smoked paprika for more punch.
- Chives or Green Onions: I toss these in for a mild onion hit and a splash of color. If you’re out, fresh parsley or dill can add a similar brightness.
Notes for ingredient swaps
- Dairy-Free: Swap mayonnaise for mashed avocado or silken tofu for creaminess, but expect a slightly earthier flavor and different texture.
- Vegan: Use vegan mayo or blended cashews to mimic a creamy, tangy filling—watch for a nuttier taste and softer consistency.
- Low-Sodium: Choose salt-free relish and reduce added salt; flavors will be milder, so compensate with herbs or a squeeze of lemon.
- Gluten-Free: This recipe is naturally gluten-free, but double-check relish and seasonings for added gluten if using store-bought.
- Smoked Flavor: Incorporate smoked paprika or a dash of liquid smoke into the filling for a smoky punch that complements the eggs.
- Herb Variations: Use dill, parsley, or basil instead of chives for different aromatic notes; fresh herbs always brighten the filling.
- Spicy Kick: Mix in a dash of hot sauce or cayenne for heat; be cautious—beginners might find it overwhelming, so start small.
Equipment & Tools
- Large saucepan: To boil the eggs evenly.
- Slotted spoon: To lower and lift eggs safely into boiling water.
- Ice bath (bowl with cold water): To stop cooking and facilitate peeling.
- Sharp serrated knife: To slice eggs cleanly without crushing.
- Mixing bowl: To mash yolks and mix filling ingredients.
- Spoon or piping bag: To fill egg whites neatly.
- Small spoon or toothpick: To assist in filling and topping.
Step-by-step Guide to Stuffed Eggs
- Gather your eggs and bring a pot of water to a gentle boil, about 10 minutes. Use a size 3-4 quart pot for even cooking.
- Once boiling, carefully lower eggs into water with a slotted spoon. Reduce heat to medium (about 85°C/185°F) and simmer for 9-10 minutes. The eggs should be firm, with no runny whites.
- Drain and immediately rinse eggs under cold water or ice bath for at least 5 minutes. This stops cooking and makes peeling easier.
- Gently tap eggs to crack shells, then peel under cold running water, removing all shell fragments. Pat eggs dry with a paper towel.
- Slice eggs in half lengthwise with a sharp serrated knife. Carefully scoop out yolks into a mixing bowl, leaving whites intact.
- Prepare the filling: mash yolks with mayonnaise, Dijon, relish, and season with salt and pepper. Mix until smooth but still fluffy. Taste and adjust seasoning if needed.
- Spoon or pipe the yolk mixture back into the egg whites, mounding slightly. Don’t worry about neatness—messy is fine.
- Sprinkle the tops with paprika and chopped chives or green onions for color. Lightly press to set the toppings.
- Rest the stuffed eggs in the fridge for 15-20 minutes to let flavors meld and filling firm up.
- Serve at room temperature or chilled, with a quick visual check: filling should be creamy and slightly mounded, paprika bright, and eggs cool to the touch.
Place the stuffed eggs on a platter, cover loosely with plastic wrap, and chill for at least 15 minutes. Serve at room temperature or chilled, garnished with extra paprika and herbs if desired.
How to Know It’s Done
- Egg whites should be firm and smoothly peeled, no shell fragments remain.
- Yolk filling is creamy, well-seasoned, and holds shape when scooped.
- Toppings are vibrant; paprika is smoky and bright, chives fresh and green.
Messy Stuffed Eggs
Ingredients
Equipment
Method
- Place the eggs in a large saucepan and cover with cold water. Bring to a gentle boil over medium heat, then reduce the heat and simmer for 9-10 minutes until the whites are firm.
- Use a slotted spoon to transfer the eggs into an ice bath, letting them cool completely for at least 5 minutes. This makes peeling easier and stops the cooking process.
- Gently tap each egg on the counter and peel away the shells under cold running water, ensuring all shell fragments are removed. Pat the eggs dry with a paper towel.
- Slice each egg in half lengthwise with a sharp serrated knife. Carefully scoop out the yolks into a mixing bowl, leaving the whites intact. Set the whites aside on a platter.
- Using a fork or a potato masher, mash the yolks until smooth. Add mayonnaise, Dijon mustard, relish, and a pinch of salt and pepper. Mix until creamy and well combined.
- Spoon the yolk mixture back into the egg white halves, piling slightly over the edges for a messy, satisfying look. Use a small spoon or piping bag for neater filling if desired.
- Sprinkle the tops generously with paprika and chopped green onions for color and flavor. Gently press the toppings into the filling to help them stay in place.
- Arrange the stuffed eggs on a serving platter, cover loosely with plastic wrap, and refrigerate for 15-20 minutes to allow flavors to meld and filling to firm up.
- Serve these messy, playful eggs at room temperature or chilled, encouraging everyone to dig in with their fingers and enjoy the creamy, flavorful bites.
Tips & Tricks for Perfect Stuffed Eggs
- Bolded Mini-Head: Use a gentle boil—avoid vigorous bubbling to prevent eggs from cracking.
- Bolded Mini-Head: Chill eggs immediately after boiling—cold water helps the shells come off smoothly.
- Bolded Mini-Head: When peeling, roll eggs lightly on the counter to crack shells evenly, then peel under water.
- Bolded Mini-Head: Mix yolks thoroughly until smooth—resist overmixing to keep the filling fluffy and creamy.
- Bolded Mini-Head: When piping, use a small star tip for a tidy, decorative look—press gently for even filling.
- Bolded Mini-Head: Top with paprika just before serving—smoke it lightly over the eggs for a deeper aroma.
- Bolded Mini-Head: Rest stuffed eggs in the fridge for at least 15 minutes—this helps flavors meld and filling set.
Common mistakes and how to fix them
- FORGOT to peel eggs carefully → Peel eggs under cold water for smooth removal.
- DUMPED eggs into boiling water too quickly → Lower eggs gently to prevent cracking.
- OVER-TORCHED eggshells → Use a gentle tap and cold water to ease peeling.
- MISSED seasoning in filling → Taste and season filling before stuffing for flavor balance.
Quick Fixes for Egg Troubles
- If eggs crack during boiling, add a splash of vinegar to the water for easier peeling.
- When eggs are difficult to peel, soak them in ice water for 5 minutes to loosen shells.
- Splash cold water over peeled eggs to stop residual cooking and prevent greenish yolks.
- Patch over cracks with a tiny bit of extra filling—no one will notice the imperfection.
- Shield the eggs from direct sunlight during storage to prevent discoloration or bleaching.
Prep, store, and reheat tips
- Prepare the eggs and boil them up to a day in advance. Cool, peel, and keep in an airtight container in the fridge. The shells peel easier when eggs are a few hours old, and it saves time on the day of serving.
- Make the filling a few hours ahead—keep it covered in the fridge. The flavors meld better overnight, but if you’re in a rush, a quick stir before stuffing works fine. The creamy texture holds up well for 24 hours.
- Stuffed eggs can be assembled a day ahead and stored in the fridge, covered loosely with plastic wrap. The whites stay firm, and the filling remains fresh and creamy. Just add the paprika and herbs right before serving for best color and aroma.
- Reheat is not necessary for this dish—serve chilled or at room temperature. If you want to serve slightly chilled, take them out about 30 minutes before eating. The filling may firm up in the fridge, so a gentle brought to room temp helps restore creaminess.
Top questions about stuffed eggs
1. How do I peel eggs without breaking the shell?
Peel eggs carefully under cold water to keep shells intact and make peeling easier.
2. What’s the best way to fill the egg whites evenly?
Use a piping bag or small spoon to fill eggs neatly, making them look more appealing.
3. Should I refrigerate stuffed eggs before serving?
Chill the filled eggs for at least 15 minutes to let flavors meld and filling set properly.
4. How do I season the filling properly?
Add a pinch of salt and pepper to the yolk mixture, tasting as you go for balanced flavor.
5. Can I use different types of paprika?
Use smoked paprika or regular paprika depending on how smoky or mild you want the topping.
6. How long do stuffed eggs stay fresh in the fridge?
Leftover eggs can be stored in the fridge for up to 24 hours, covered loosely to prevent drying out.
7. What if my eggs are hard to peel?
If eggs are difficult to peel, soak them in ice water for 5 minutes after boiling.
8. How do I keep the filling fluffy and not mushy?
Avoid overmixing the yolk filling to keep it fluffy; mix just until smooth.
9. Can I make the filling dairy-free or healthier?
For a tangier flavor, substitute mayonnaise with Greek yogurt or mashed avocado.
10. What do I do if my eggs crack while boiling?
If eggs crack during boiling, add a splash of vinegar to the water to help prevent it.
These stuffed eggs are a reminder that simplicity can be playful and unexpectedly satisfying. They’re perfect for when you want a quick, hands-on snack that still feels special. Every bite offers that creamy, tangy punch with a little messy charm.
Right now, they’re a great pick-me-up for any casual gathering or lazy weekend. Plus, they’re flexible—play with flavors, toppings, or fillings to make them truly your own. Sometimes, the best bites come from a little chaos in the kitchen.

Hi, I’m Hannah Reynolds, the heart behind Seasoning Therapist. I believe food can comfort, restore, and gently reset us after a long day. I started Seasoning Therapist with one simple idea in mind: cooking is not just about feeding the body, it is about caring for the mind too. The right seasoning can change the mood of a dish, and sometimes even the mood of the person eating it. This blog is where I combine my love for thoughtful cooking with my belief that the kitchen can be a place of healing.
