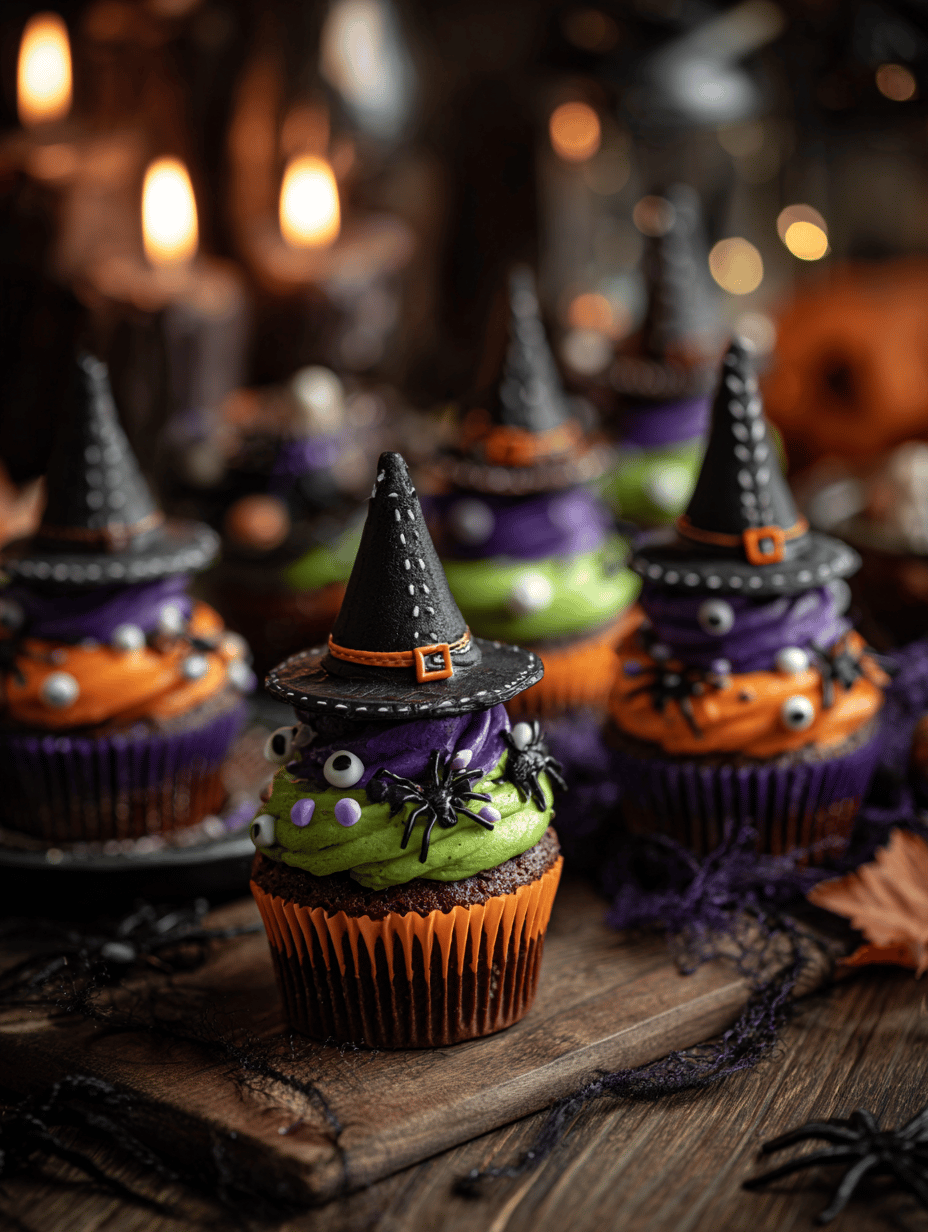
Witch hat cupcakes are a fun twist on the classic cupcake, perfect for Halloween or any spooky-themed gathering. I love how they turn out a bit chaotic, with frosting that’s a little oozy and hats that wobble just right. It’s a messy, joyful process that turns simple ingredients into something playful and a little eerie.
Why These Witch Hat Cupcakes Are Worth the Repeat
They’re a chaotic, imperfect mess that somehow feels festive and handmade. Every time I make them, I get to relive childhood Halloween memories, mixing batter while the house smells of warm sugar and cocoa. Plus, the joy of decorating—those tiny hats—never gets old, even after dozens of tries. They’re a reminder that messy, fun baking is often the most memorable.
Ingredients Breakdown for Witch Hat Cupcakes
- All-purpose flour: Forms the cupcake structure, keeps it tender and moist.
- Granulated sugar: Sweetens and helps with browning, adds a slight crunch.
- Baking powder: Leavens the batter, gives the cupcakes lift.
- Eggs: Bind the ingredients, add richness and moisture.
- Milk: Keeps the batter smooth, enhances softness.
- Butter: Adds richness, flavor, and moisture, melts into the batter.
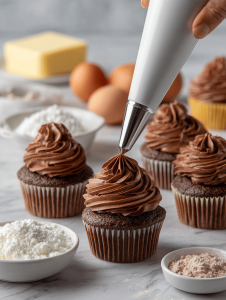
- Chocolate frosting: Creates a luscious, sweet layer—think smoky cocoa with a hint of vanilla.
Tools of the Trade for Witch Hat Cupcakes
- Electric mixer: To whip the frosting until fluffy and light.
- Cupcake tin: Holds the cupcake liners steady during baking.
- Piping bag with a round tip: To pipe the frosting smoothly onto cupcakes.
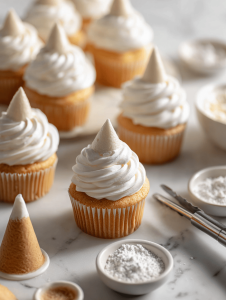
- Mini cones or cookies: To serve as the hats that top each cupcake.
- Cooling rack: To cool cupcakes evenly and prevent sogginess.
Step-by-Step for Spooky Sweetness
Step 1: Preheat your oven to 180°C (350°F).
Step 2: Line a cupcake tin with paper liners.
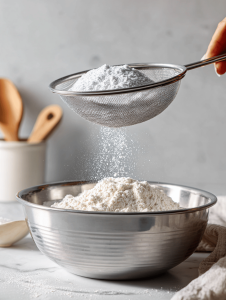
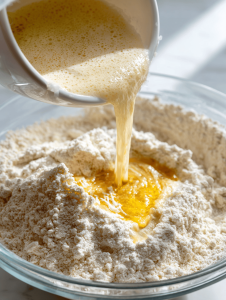
Step 3: Mix your dry ingredients: flour, sugar, baking powder, and a pinch of salt.
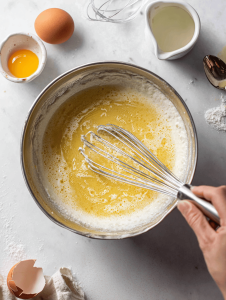
Step 4: In another bowl, whisk together eggs, milk, melted butter, and vanilla.
Step 5: Combine wet and dry ingredients until just mixed, don’t overdo it.
Step 6: Fill each cupcake liner about two-thirds full.
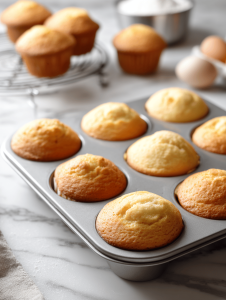
Step 7: Bake for 18-20 minutes, until the tops are golden and a toothpick comes out clean.
Step 8: Let cupcakes cool in the tin for 5 minutes, then transfer to a wire rack.
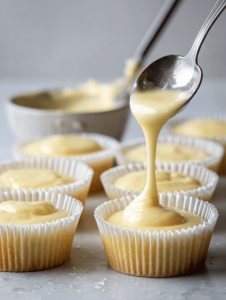
Step 9: While cooling, prepare your chocolate frosting and fondant for hats.
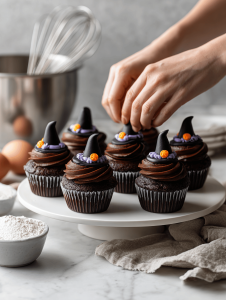
Step 10: Once cooled, decorate with frosting and add the mini cone or cookie to resemble a witch hat.
Catching the Perfect Witch Hat Cupcake
- Ensure the cupcakes are fully cooled before decorating to prevent melting the frosting.
- The frosting should be fluffy but firm enough to hold the hat shape.
- The mini cone or cookie must be firmly pressed into the frosting to stay upright.
- Look for a golden-brown top and a slight crackle on the cupcake surface to indicate doneness.
Avoid These Common Witch Hat Cupcake Mistakes
- Over-mixing the batter, resulting in dense cupcakes.? Use room temperature ingredients to prevent batter from curdling.
- Applying frosting when cupcakes are still warm.? Handle the frosting gently to keep it airy and light.
- Not embedding the mini cone or cookie deep enough.? Press the hat firmly into the frosting for stability.
- Underbaking, leading to soggy cupcakes.? Bake until the edges are golden and the toothpick comes out clean.
Witch Hat Cupcakes
Ingredients
Equipment
Method
- Preheat your oven to 180°C (350°F) and line a cupcake tin with paper liners.
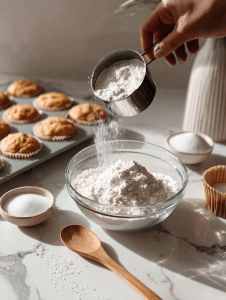
- In a large bowl, sift together the flour, sugar, baking powder, and salt to ensure even distribution.
- In a separate bowl, whisk the eggs, warm milk, melted butter, and vanilla extract until well combined and slightly frothy.
- Gradually pour the wet mixture into the dry ingredients, folding gently until just combined and smooth — avoid overmixing to keep the batter light.
- Divide the batter evenly among the cupcake liners, filling each about two-thirds full for a nice rise.
- Bake the cupcakes for 18-20 minutes, or until they turn golden on top and a toothpick inserted in the center comes out clean.
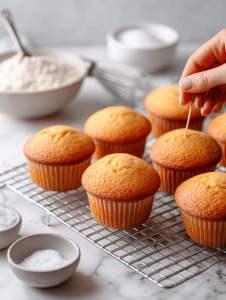
- Remove the cupcakes from the oven and let them cool in the tin for about 5 minutes, then transfer them to a cooling rack to cool completely.
- Once cooled, fill a piping bag fitted with a round tip with the chocolate frosting and pipe generous swirls onto each cupcake, creating a slightly messy, oozy look.
- Carefully press a mini cone or cookie into the frosting at the top of each cupcake, pressing firmly to ensure it stays upright and resembles a witch hat.
- Arrange the decorated cupcakes on a serving platter, and enjoy their playful, spooky appearance and rich chocolate flavor.
Notes

Hi, I’m Hannah Reynolds, the heart behind Seasoning Therapist. I believe food can comfort, restore, and gently reset us after a long day. I started Seasoning Therapist with one simple idea in mind: cooking is not just about feeding the body, it is about caring for the mind too. The right seasoning can change the mood of a dish, and sometimes even the mood of the person eating it. This blog is where I combine my love for thoughtful cooking with my belief that the kitchen can be a place of healing.
