This baked chicken cutlets recipe started as a way to get that crispy, golden exterior without the mess of frying. I was tired of the grease splatters and lingering smell that usually comes with frying up thin chicken breasts, so I played around with oven temps and coatings until I found a method that works reliably. It’s about that satisfying crunch, but easier to make on a busy weeknight.
There’s something honest about oven-baked chicken—crisp on the outside, juicy inside, and it all comes together with just a few pantry staples. This recipe is my go-to when I want comfort food without the fuss, especially when I need something quick and reliable. Plus, no oil splatters, no hot oil to worry about, just simple, honest cooking that turns out perfectly every time.
This recipe focuses on how to achieve perfectly crispy chicken cutlets without deep frying, using only the oven. It’s about mastering the art of oven-baked crunch, so you get that satisfying texture with less mess and fuss. I’ve tinkered with different coatings and oven temps, and finally found a method that’s reliable, simple, and doesn’t compromise on flavor or crunch.
Crispy Oven Baked Chicken
- Cooking this dish reminds me of Sunday afternoons with my grandma, who made chicken cutlets that were crispy yet tender inside.
- I love that this recipe gives me a reliable way to get that perfect crunch without deep frying, especially after long days when I crave something satisfying but simple.
- There’s a nostalgic joy in hearing that satisfying crackle as I lift each cutlet from the oven, a sign that my oven magic worked.
- Sometimes I get a little proud watching my kids attack these cutlets with gusto, knowing I’ve kept it healthy without sacrificing flavor.
- It’s chaos in my kitchen when I try to double the batch, but the smell of seasoned chicken baking always pulls me back to the moment.
Personal Inspiration
- This recipe was born out of a desire to make chicken cutlets that are crispy and satisfying without the greasy mess of frying. I wanted that crunch, that crackle, but with less fuss and fewer dishes. It’s about finding that happy middle ground—crisp on the outside, juicy inside, all baked, all simple.
- I remember a weekend when I had friends over and forgot to buy enough breading for my usual fried version. Instead, I threw the chicken in the oven with a quick coat of seasoned breadcrumbs, and everyone loved it. That moment made me realize baked could be better—more reliable, cleaner, and just as delicious.
- heading: ‘The story behind this recipe’
Trivia and Historical Tidbits
- Chicken cutlets became popular in Europe during the 19th century as a quick, versatile way to prepare poultry.
- The technique of pounding chicken thin helps it cook faster and creates that tender, even texture everyone loves.
- Baking instead of frying emerged as a healthier trend in the mid-20th century, but cooks still wanted that crispiness.
- In many Southern European countries, oven-baked breaded chicken is a staple, often flavored with herbs and lemon zest.
- This method echoes traditional family recipes but adapts it for modern busy kitchens seeking less oil and mess.
Key Ingredients Breakdown
- Chicken breasts: I prefer boneless, skinless for quick cooking and tenderness, but a slightly thicker cut keeps it juicy—try pounding to even thickness for uniform doneness.
- Breadcrumbs: I use panko for that extra crunch and airy texture—if you want a gluten-free option, crushed cornflakes work surprisingly well and stay crispy.
- Egg wash: It’s the glue that helps the coating stick—beat a couple of eggs with a splash of water or milk, which makes the crust cling better and adds a little richness.
- Herbs and spices: I like a simple mix of paprika, garlic powder, and thyme—feel free to add a pinch of cayenne if you want a smoky heat, but don’t overdo it, or it masks the chicken’s natural flavor.
- Oil spray: Just a light spritz of high-heat oil ensures crispiness without greasiness—botched it by using too much, so go light and even.
- Lemon: A squeeze at the end brightens everything—don’t skip it; that zing lifts the whole dish from dull to vibrant, especially when paired with a crispy coating.
- Salt: Season the chicken generously before coating—undersalting makes the flavor dull; trust me, a good salt rub makes all the difference.
Spotlight on key ingredients
Chicken breasts:
- I prefer boneless, skinless for quick cooking and tenderness, but a slightly thicker cut keeps it juicy—try pounding to even thickness for uniform doneness.
- Breadcrumbs: I use panko for that extra crunch and airy texture—if you want a gluten-free option, crushed cornflakes work surprisingly well and stay crispy.
- Lemon: A squeeze at the end brightens everything—don’t skip it; that zing lifts the whole dish from dull to vibrant, especially when paired with a crispy coating.
Breadcrumbs:
- I use panko for that extra crunch and airy texture—if you want a gluten-free option, crushed cornflakes work surprisingly well and stay crispy.
- Lemon: A squeeze at the end brightens everything—don’t skip it; that zing lifts the whole dish from dull to vibrant, especially when paired with a crispy coating.
Notes for ingredient swaps
- Dairy-Free: Use almond or coconut milk in the egg wash—less rich, but still helps the coating stick.
- Gluten-Free: Swap panko for crushed gluten-free cereal or almond flour—may change the crunch slightly.
- Low-Sodium: Choose unsalted breadcrumbs and skip added salt—flavor relies more on spices and herbs.
- Herb Variations: Fresh parsley or basil can replace thyme—adds brightness and freshness to the coating.
- Spice Level: Omit paprika or cayenne for milder flavor—use milder spices or herbs to suit your taste.
- Citrus Brightness: Swap lemon with lime or vinegar—adds a different tang, but keep it light to avoid overpowering.
- Oil Spray: Use a light mist of avocado or peanut oil—provides crunch without greasiness, but don’t overdo it.
Equipment & Tools
- Oven: Cook the cutlets evenly with dry heat.
- Baking sheet with parchment or silicone mat: Provide a non-stick surface for baking and easy cleanup.
- Shallow dishes: Hold egg wash and breadcrumbs for dredging.
- Meat mallet or rolling pin: Pound chicken to even thickness for uniform cooking.
- Tongs: Handle chicken safely and precisely when coating.
Step-by-step guide to baked chicken cutlets
- Preheat your oven to 220°C (430°F). Line a baking sheet with parchment or a silicone mat for easy cleanup.
- Prepare your equipment: a shallow dish for the egg wash, a second for the breadcrumbs, and a baking sheet. Optional: a meat mallet or rolling pin to even out chicken thickness.
- Pound the chicken breasts to an even thickness of about 1.5 cm (0.6 inches). This ensures uniform cooking and crispiness.
- Season the chicken generously with salt and your preferred spices—paprika, garlic powder, thyme. Let sit for 5 minutes to absorb flavors.
- Set up your dredging station: whisk eggs in the first dish, spread seasoned breadcrumbs in the second.
- Dip each piece of chicken into the egg wash, letting excess drip off. Then coat thoroughly in breadcrumbs, pressing gently to stick.
- Arrange the coated cutlets on the prepared baking sheet, leaving space between each. Give a light spray or drizzle of oil over the top for extra crunch.
- Bake in the preheated oven for 15–20 minutes. Flip halfway through for even browning. Look for a golden, crispy crust and no pink in the center.
- Check for doneness: the crust should be deep golden, and the chicken should reach an internal temperature of 74°C (165°F). The coating should crackle when you tap it.
- Remove from oven. Let rest for 5 minutes before serving to allow juices to settle and the crust to firm up.
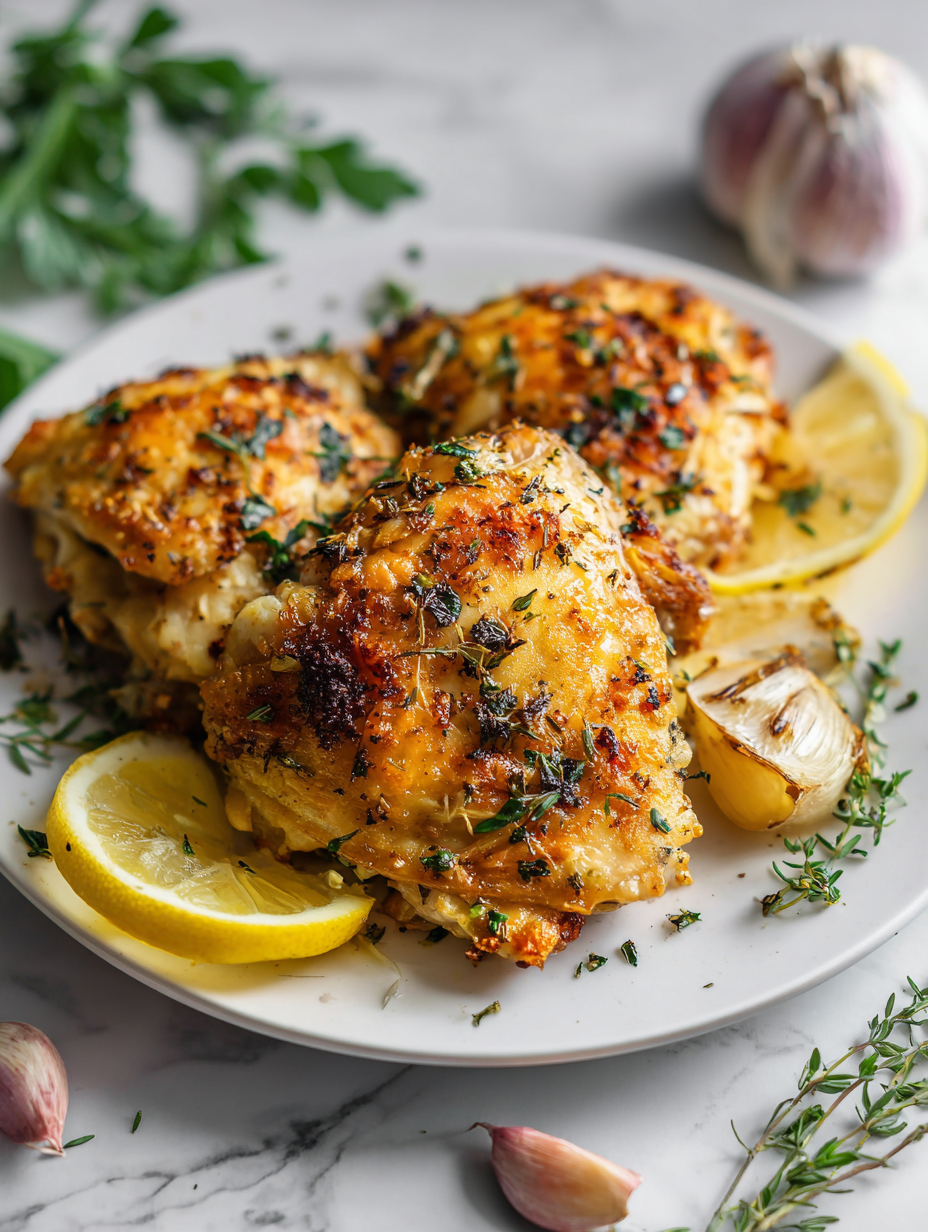
- Plate with a squeeze of lemon and your favorite sides. Enjoy that satisfying crunch with juicy, tender chicken inside.
Let the chicken rest for 5 minutes on a wire rack or plate. Finish with a squeeze of lemon and serve hot, crispy on the outside, juicy inside.
How to Know It’s Done
- Crust is golden and crisp, not pale or soggy.
- Internal temperature hits 74°C (165°F) for safe, juicy chicken.
- Crackling sound when tapping the crust indicates proper crunch.
Crispy Oven Baked Chicken
Ingredients
Equipment
Method
- Preheat your oven to 220°C (430°F). Line a baking sheet with parchment paper or a silicone mat for easy cleanup.
- Pound each chicken breast to an even thickness of about 1.5 cm (0.6 inches) using a meat mallet or rolling pin. This helps the chicken cook evenly and stay tender.
- Season the chicken generously with salt, paprika, garlic powder, and thyme. Let it sit for about 5 minutes to absorb the flavors.
- Set up your dredging station: whisk eggs with a splash of water or milk in one shallow dish, and spread the seasoned panko breadcrumbs in another.
- Dip each chicken piece into the egg mixture, ensuring it is coated all over. Let any excess drip off, then press it into the breadcrumbs, pressing gently to help the coating adhere.
- Place the coated chicken cutlets onto the prepared baking sheet, spacing them out evenly. Lightly spray the tops with high-heat oil for extra crispiness.
- Bake the chicken in the preheated oven for 15–20 minutes, flipping halfway through, until the crust is golden brown and crispy. You'll hear a gentle crackle as the coating crisps up.
- Check the internal temperature of the chicken; it should reach 74°C (165°F). The crust should be deep golden and crunchy to the touch.
- Remove from the oven and let rest for about 5 minutes. Squeeze fresh lemon juice over the chicken to add brightness and flavor.
- Serve your crispy oven-baked chicken hot, paired with your favorite sides. Enjoy that satisfying crunch and juicy bite with every piece.
Tips for perfect baked chicken cutlets
- Bolded tip: Use panko breadcrumbs for an airy crunch that stays crispy even after baking.
- Bolded tip: Spray the coated chicken lightly with oil before baking to enhance crispiness and golden color.
- Bolded tip: Pound chicken to even thickness—this ensures uniform cooking and prevents overbaking thinner parts.
- Bolded tip: Bake on a wire rack set over the sheet—air circulates, keeping the crust crisp all around.
- Bolded tip: Flip the cutlets halfway through baking—this promotes even browning and crunch on both sides.
- Bolded tip: Let the chicken rest for 5 minutes after baking—this keeps juices in and crust intact.
- Bolded tip: Finish with a squeeze of lemon—brightens the flavor and cuts through the richness of the coating.
Common mistakes and how to fix them
- FORGOT to preheat the oven → Always preheat for even cooking and crunch.
- DUMPED too much oil → Use a light spray for crispiness without greasiness.
- OVER-TORCHED the crust → Keep an eye at 15 minutes; adjust time if needed.
- UNDER-seasoned the chicken → Season generously before coating for full flavor.
Quick fixes and pantry swaps
- If the crust isn’t crispy, splash a little more oil and bake a few minutes longer.
- When chicken sticks to the pan, patch with a gentle nudge and continue baking.
- Splash lemon juice over burnt edges to brighten and mask overcooked spots.
- When the breading falls off, rescue with an egg wash dip and re-coat before baking.
- Pantry swap: crushed cornflakes replace breadcrumbs for extra crunch and a different texture.
Prep, store, and reheat tips
- Prep the breading station and coat the chicken the night before; keep covered in the fridge for up to 24 hours. The coating stays crispy and flavorful, even after a night in the fridge.
- Store cooked chicken cutlets in an airtight container in the fridge for 2-3 days. Reheat in the oven at 175°C (350°F) for about 10 minutes until heated through and crispy again.
- For longer storage, freeze the breaded cutlets unbaked for up to a month. Thaw in the fridge overnight before baking as usual. Expect a slightly softer crust after freezing, but still tasty.
- Reheating from frozen: bake at 180°C (355°F) for 20-25 minutes. The smell of toasted breadcrumbs and the crackle when you bite into it will tell you it’s reheated properly.
- Avoid reheating in the microwave unless you want soggy coating. The oven or toaster oven keeps that crunch, with a warm, fragrant aroma of baked chicken and seasoned breadcrumbs.
Top questions about baked chicken cutlets
1. How do I know when the chicken is fully cooked?
Use an instant-read thermometer to check if the internal chicken reaches 74°C (165°F).
2. Can I skip the oil spray for a healthier version?
Breading can be crispy enough with just a light spray of oil before baking.
3. Why is my chicken unevenly cooked or not crispy?
Pound the chicken to an even thickness to ensure uniform cooking and crispiness.
4. What kind of breadcrumbs work best?
Using panko breadcrumbs gives a lighter, crunchier crust compared to regular breadcrumbs.
5. How long should I bake the chicken cutlets?
Bake at 220°C (430°F) for 15–20 minutes, flipping halfway for even color and crunch.
6. Can I prepare these in advance and freeze them?
You can freeze breaded raw chicken cutlets for up to a month, then bake directly from frozen.
7. How can I improve the flavor if I want it more tangy?
Add a squeeze of lemon after baking to enhance flavor and brighten the dish.
8. What’s the best way to reheat leftovers without losing crunch?
Reheat in the oven at 175°C (350°F) for about 10 minutes to keep the crust crispy.
9. How do I make sure my chicken cooks evenly?
Use a meat mallet or rolling pin to pound chicken evenly, ensuring consistent doneness.
10. Can I customize the spice mix for different flavors?
Adjust seasoning in the breadcrumb mixture to suit your taste—add herbs, spices, or a pinch of cayenne.
There’s a quiet satisfaction in knowing these chicken cutlets come out crispy and tender every time, no matter how busy the week gets. The aroma of seasoned breadcrumbs and that first crackle when you bite into the crust always reminds me why I keep coming back to this simple, honest dish.
And honestly, once you get the hang of this baked method, it’s hard to go back to fried. It’s just as satisfying—less mess, fewer worries—and it still hits that craving for something crunchy and comforting. A good baked chicken cutlet feels like a small win in the kitchen, every single time.

Hi, I’m Hannah Reynolds, the heart behind Seasoning Therapist. I believe food can comfort, restore, and gently reset us after a long day. I started Seasoning Therapist with one simple idea in mind: cooking is not just about feeding the body, it is about caring for the mind too. The right seasoning can change the mood of a dish, and sometimes even the mood of the person eating it. This blog is where I combine my love for thoughtful cooking with my belief that the kitchen can be a place of healing.
