Making a chocolate fondant is like chasing that perfect moment when the outside is just set, and the inside is a luscious, molten river of chocolate. It’s a tactile dance—pressing the first bite and feeling that warm, gooey center run over your tongue. It’s honest, imperfect, but utterly addictive.
This recipe isn’t about precision perfection, but about embracing the messy, sensory joy of molten chocolate. It’s about that satisfying crack as the crust gives way and the chocolate spills out, rich and velvety, making every forkful a small act of indulgence. It’s a culinary hug, even if it’s a little chaotic to get just right.
I love how this dessert transforms simple ingredients into something deeply personal. It’s a quick fix, yet each time I make it, I feel that rush of nostalgia and pride—like I’ve captured a moment of pure, molten bliss, ready to be shared or savored solo.
Focusing on the tactile experience of perfecting the gooey center, this recipe emphasizes the sensory joy of the runny, molten chocolate as it melts on the tongue, making each bite an intimate moment of culinary discovery.
The tactile joy of molten chocolate
- Biting into a warm fondant still makes my heart skip — that perfect crack and rush of molten chocolate always surprises me.
- I remember the first time I nailed this recipe; it was chaos in the kitchen, but that gooey center made every mess worth it.
- There’s something deeply satisfying about the tactile contrast — the firm crust giving way to silky, oozing richness on my tongue.
- Making this dessert reminds me of cozy family dinners, the kind that slow down time and make sweetness linger long after the last bite.
- Every time I serve this, I feel a mix of pride and relief — like I’ve created a little piece of edible art that’s perfectly imperfect.
The tactile joy of molten chocolate
I stumbled onto this recipe during a particularly hectic week when I needed something quick yet decadent. The idea of a molten center, just a few minutes in the oven, gave me a moment of calm amidst chaos. Every spoonful feels like a small victory, a reminder that simple ingredients can deliver a burst of pure pleasure when handled with care. It’s become my go-to for when I want to impress without stressing, and I love how it turns out every time, even with my messy kitchen habits.
Chocolate Fondant Trivia
- Chocolate fondant, also known as molten lava cake, was reportedly invented in the 1980s, with several chefs claiming to have created it independently.
- The dessert became popular in France before spreading worldwide, often served in upscale restaurants as a show-stopping finale.
- Its name, ‘fondant,’ comes from the French word for ‘melted,’ highlighting the signature gooey, flowing center that defines the dish.
Ingredient breakdown: key components
- Dark chocolate: I prefer a 70% cocoa bar—rich, slightly bitter, and melts smoothly, giving that deep chocolate flavor I crave. Swap with bittersweet if you want less intensity.
- Butter: Unsalted butter makes for a silky, luscious center. If you use salted, cut back on the salt in the recipe to avoid overpowering the chocolate’s richness.
- Eggs: Fresh, large eggs help the batter rise just right and create that tender crumb. For a slightly lighter texture, try adding an extra egg yolk—just be mindful of the bake time.
- Sugar: Fine granulated sugar dissolves quickly and adds a subtle sweetness. You can substitute with coconut sugar for a hint of caramel, but it’ll change the color and slightly dull the gloss.
- Flour: A small amount of all-purpose flour provides structure. Using almond flour can add nuttiness but may make the fondant denser—use sparingly.
- Cocoa powder: Dutch-processed cocoa gives a smoother, less acidic chocolate flavor, but natural cocoa works if you prefer a sharper taste. Sift to avoid lumps.
- Vanilla extract: A splash of vanilla brightens the chocolate. For a twist, try a dash of coffee extract—deepens the chocolate’s smoky undertones and amplifies richness.
Spotlight on key ingredients
Dark chocolate:
- I prefer a 70% cocoa bar—rich, slightly bitter, and melts smoothly, giving that deep chocolate flavor I crave. Swap with bittersweet if you want less intensity.
- Butter: Unsalted butter makes for a silky, luscious center. If you use salted, cut back on the salt in the recipe to avoid overpowering the chocolate’s richness.
- Cocoa powder: Dutch-processed cocoa gives a smoother, less acidic chocolate flavor, but natural cocoa works if you prefer a sharper taste. Sift to avoid lumps.
Eggs and Sugar:
- Eggs: Fresh, large eggs help the batter rise just right and create that tender crumb. For a slightly lighter texture, try adding an extra egg yolk—just be mindful of the bake time.
- Sugar: Fine granulated sugar dissolves quickly and adds a subtle sweetness. You can substitute with coconut sugar for a hint of caramel, but it’ll change the color and slightly dull the gloss.
- Flour: A small amount of all-purpose flour provides structure. Using almond flour can add nuttiness but may make the fondant denser—use sparingly.
Notes for ingredient swaps
- Dairy-Free: Swap butter for coconut oil or vegan margarine. Expect a slightly different richness and a hint of coconut aroma.
- Vegan Chocolate: Use dairy-free dark chocolate and plant-based butter substitutes. The gooey center remains, but flavor may be a tad fruitier.
- Gluten-Free: Replace regular flour with almond flour or gluten-free baking mix. Be aware it might make the fondant denser and nuttier.
- Sugar Alternatives: Try coconut sugar or maple sugar for a caramelized note. Expect a darker color and a slight change in texture.
- Cocoa Powder: Dutch-processed cocoa for smoothness, natural cocoa for a sharper, more acidic chocolate punch. Sift well to avoid clumps.
- Egg-Free: Use applesauce or aquafaba to mimic the binding. The texture might be a tad less tender but still delightfully gooey.
- Sweetener Boost: Add a pinch of sea salt or espresso powder to enhance chocolate depth—just a tiny pinch for a big flavor punch.
Equipment & Tools
- Ramekins: To hold the batter during baking and shape the fondant.
- Double boiler or microwave: To melt the chocolate and butter gently without burning.
- Whisk: To combine eggs and sugar smoothly and aerate slightly.
- Spatula: To fold ingredients without deflating the batter.
- Oven: To bake the fondants evenly at a controlled temperature.
- Knife: To loosen and invert the baked fondants for serving.
Step-by-step guide to chocolate fondant
- Preheat your oven to 200°C (390°F). Grease 4 ramekins—don’t skimp; these are your tiny chocolate vessels.
- Melt 150g dark chocolate and 100g butter together. Use a double boiler or microwave in 20-second bursts, stirring each time until smooth and glossy. Smell that rich cocoa aroma—you’re almost there.
- In a separate bowl, whisk 3 large eggs, 80g sugar, and a splash of vanilla until just combined. The mixture should be slightly frothy and pale.
- Fold the cooled chocolate mixture into the egg mixture gently. Add 30g flour and sifted cocoa powder. Mix until just incorporated—don’t overdo it, or the fondant loses its ooze.
- Divide the batter evenly among the ramekins. Tap gently on the counter to settle any bubbles and level the tops. The batter should be shiny and thick, almost like melted chocolate pudding.
- Bake for 12-14 minutes. Check at 12—edges should be set, but the center still jiggles when shaken slightly. The surface might crack slightly, promising that molten core.
- Remove from oven and let sit for 2 minutes. Then, run a knife around the edges and invert onto a plate. The fondant should gently release, revealing that tempting oozy center.
- Serve immediately. The crust should be firm but tender, with a warm, liquid chocolate core that softly flows when pierced.
- To reheat, microwave for 10-15 seconds—look for a shimmer of molten chocolate. Avoid overheating; the magic can turn to rubber.
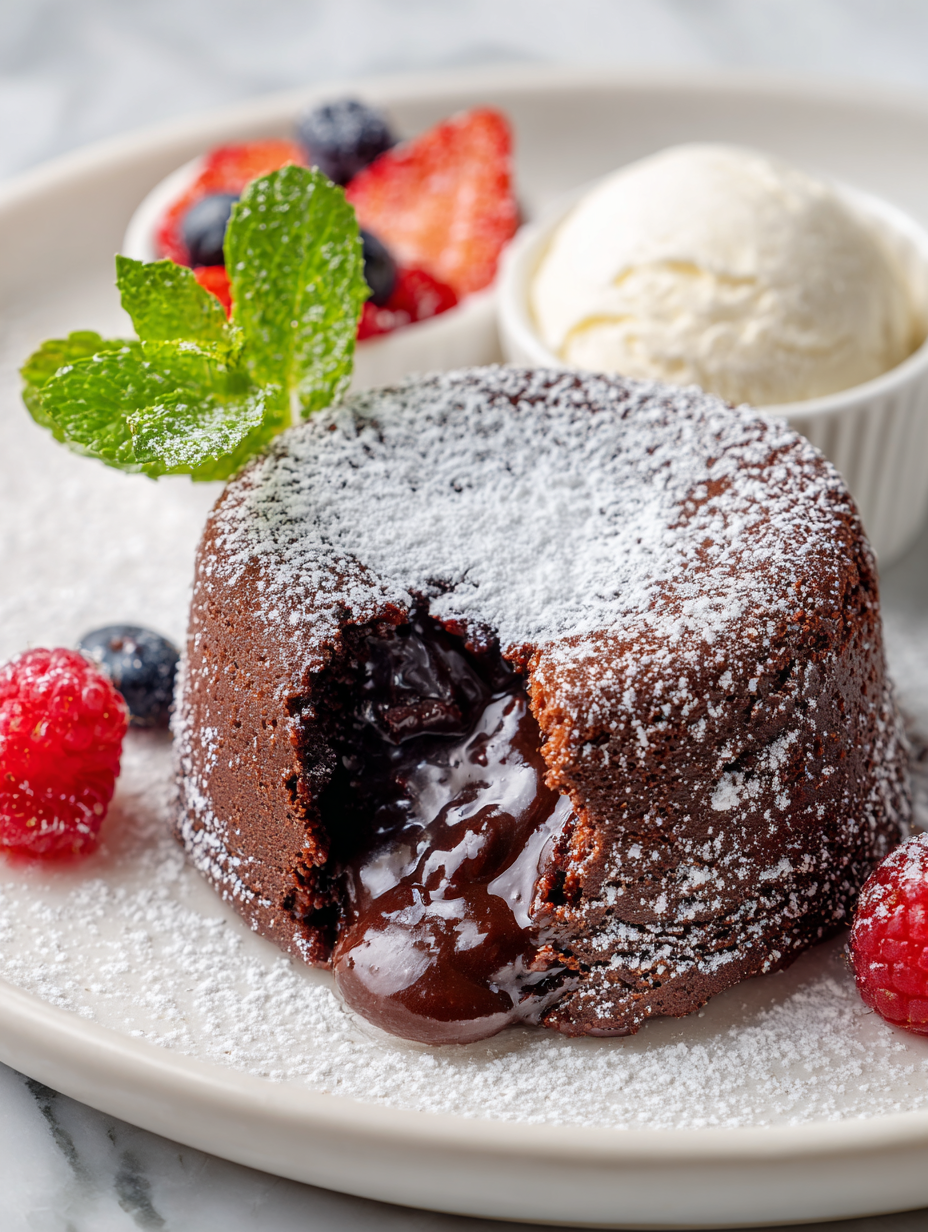
- Enjoy with a dusting of powdered sugar or a scoop of vanilla ice cream if you like, but honestly, it’s best solo—just warm, rich, and perfectly imperfect.
Let the baked fondants rest for 2 minutes before carefully inverting onto plates. Serve immediately—warm, with that luscious, flowing center that’s the whole point. If needed, dust lightly with powdered sugar or serve with a small scoop of vanilla ice cream for contrast.
How to Know It’s Done
- Crust is golden and slightly cracked, with a firm edge.
- Center jiggles gently but isn’t liquidy like a soup—just a soft, molten core.
- Probe temp at the center reads around 65°C (149°F) for perfect gooeyness.
Chocolate Fondant
Ingredients
Equipment
Method
- Preheat the oven to 200°C (390°F). Generously grease four ramekins with butter and set aside.
- Chop the dark chocolate into small pieces and melt it together with the butter using a double boiler or microwave in short bursts, stirring until smooth and glossy. Smell that rich cocoa aroma filling the air.
- In a separate bowl, whisk the eggs, sugar, and vanilla extract until the mixture is slightly frothy and pale, about 1-2 minutes.
- Gently fold the cooled chocolate mixture into the egg mixture using a spatula, combining until smooth.
- Sift the flour and cocoa powder into the batter, then carefully fold them in just until combined, avoiding overmixing to keep the batter airy.
- Divide the batter evenly among the prepared ramekins, filling each about three-quarters full. Gently tap the ramekins on the counter to release any air bubbles.
- Bake in the preheated oven for 12-14 minutes until the edges are set but the center still jiggles slightly when gently shaken. The surface may crack, hinting at the molten core inside.
- Remove the ramekins from the oven and let sit for 2 minutes. Carefully run a knife around the edges to loosen, then invert onto serving plates.
- Gently lift the ramekins away, revealing the cracked top and the luscious, molten chocolate inside that flows out when cut.
- Serve immediately while warm, enjoying the contrast between the tender crust and the silky, velvety, molten center.
Pro tips for perfect fondant
- Bolded Mini-Head: Use room temperature eggs → Ensures a smooth, even batter without lumps.
- Bolded Mini-Head: Gently fold ingredients → Keeps the batter airy and prevents deflating that delicate rise.
- Bolded Mini-Head: Check oven calibration → An oven thermometer helps avoid overbaking the fondant into a cake.
- Bolded Mini-Head: Don’t open the oven early → Wait until the 12-minute mark to prevent collapsing the crust.
- Bolded Mini-Head: Use a timer with a loud alarm → Ensures you don’t forget to check for that perfect jiggle.
- Bolded Mini-Head: Slightly underbake for ooze → Center should jiggle, but still hold together when inverted.
- Bolded Mini-Head: Rest briefly before serving → Allows the molten center to settle for that ideal flow.
Common mistakes and how to fix them
- FORGOT to check oven temperature → Use an oven thermometer for accuracy.
- DUMPED batter before baking → Pour gently to avoid bubbles that affect gooey center.
- OVER-TORCHED the fondant → Bake for a shorter time; center should jiggle slightly.
- UNDER-BAKED returns a runny center → Extend baking time by 1 minute, watch for crust formation.
Quick fixes and pantry swaps
- When batter is too thick → Splash in a little warm water to loosen it.
- If fondant cracks during baking → Patch with a tiny spoonful of melted chocolate.
- When center isn’t oozy enough → Shorten bake time by 1 minute; check for jiggle.
- DUMPED batter in the oven → Gently pour to prevent bubbles disrupting the gooey core.
- Over-torched edges → Shield with foil or reduce oven temp for next batch.
Prep, store, and reheat tips
- You can prepare the chocolate batter ahead of time—cover and keep in the fridge for up to 24 hours. The flavors meld and deepen overnight, and the batter will be easier to handle when cold, making assembly faster.
- Store baked fondants in an airtight container in the fridge for up to 2 days. Reheat briefly in the microwave—about 10-15 seconds—until just warm and the center shimmers. Be cautious not to overheat, or the molten core can turn rubbery.
- The flavor and texture are best when served within a few hours of baking. Beyond that, the crust may soften, and the molten center might lose some of its luscious ooze.
- Frozen fondants can be wrapped tightly and stored for up to 1 month. Thaw in the fridge overnight, then reheat as above. The contrast of warm crust and cold, gooey interior can be quite delightful.
Top questions about chocolate fondant
1. What exactly is a chocolate fondant?
A runny, molten center that flows out when you cut into it, creating a rich chocolate river on the plate.
2. How do I know when it’s perfectly baked?
The key is baking just enough so the edges are firm but the center jiggles slightly—like a tender, fudgy lava.
3. What kind of chocolate should I use?
Use high-quality dark chocolate with at least 70% cocoa for the deepest, most satisfying flavor and gooey texture.
4. Why isn’t my fondant gooey inside?
If the center isn’t molten enough, bake for another minute or two, or check your oven temperature—sometimes it’s off.
5. How do I prevent the fondant from being dense or cakey?
Ensure your batter isn’t overmixed, as this can deflate the rise and affect the ooze. Fold gently and don’t overdo it.
6. Should I serve it hot or at room temperature?
Serve immediately after baking for the best molten experience. Reheat gently in the microwave for a few seconds if needed.
7. What tools do I need for shaping?
Use ramekins or small ovenproof cups to shape the fondant. They help contain the batter and create that perfect crust.
8. What’s the ideal bake time?
Bake at around 200°C (390°F) for 12-14 minutes. Keep an eye on the edges—they should be set, with a slightly jiggly center.
9. Can I make this in advance?
You can prepare the batter a day ahead, keep it covered in the fridge, and bake just before serving for fresh, molten perfection.
10. My fondant cracked or is too firm—what do I do?
If the crust cracks or the center is too firm, reduce the bake time slightly or check oven accuracy—sometimes they run hot.
Biting into a warm chocolate fondant is like a secret shared between you and the dessert—rich, gooey, and deeply satisfying. It’s a little messy, a little chaotic, but that’s part of the charm. Each bite is an honest, tactile reminder that simple ingredients can create a moment of pure indulgence.
In the end, it’s not just about the perfect molten center, but about embracing the imperfect beauty of this dessert. It’s quick to make, yet somehow feels special every time. That melt-in-your-mouth moment sticks with you long after the last spoonful.

Hi, I’m Hannah Reynolds, the heart behind Seasoning Therapist. I believe food can comfort, restore, and gently reset us after a long day. I started Seasoning Therapist with one simple idea in mind: cooking is not just about feeding the body, it is about caring for the mind too. The right seasoning can change the mood of a dish, and sometimes even the mood of the person eating it. This blog is where I combine my love for thoughtful cooking with my belief that the kitchen can be a place of healing.
