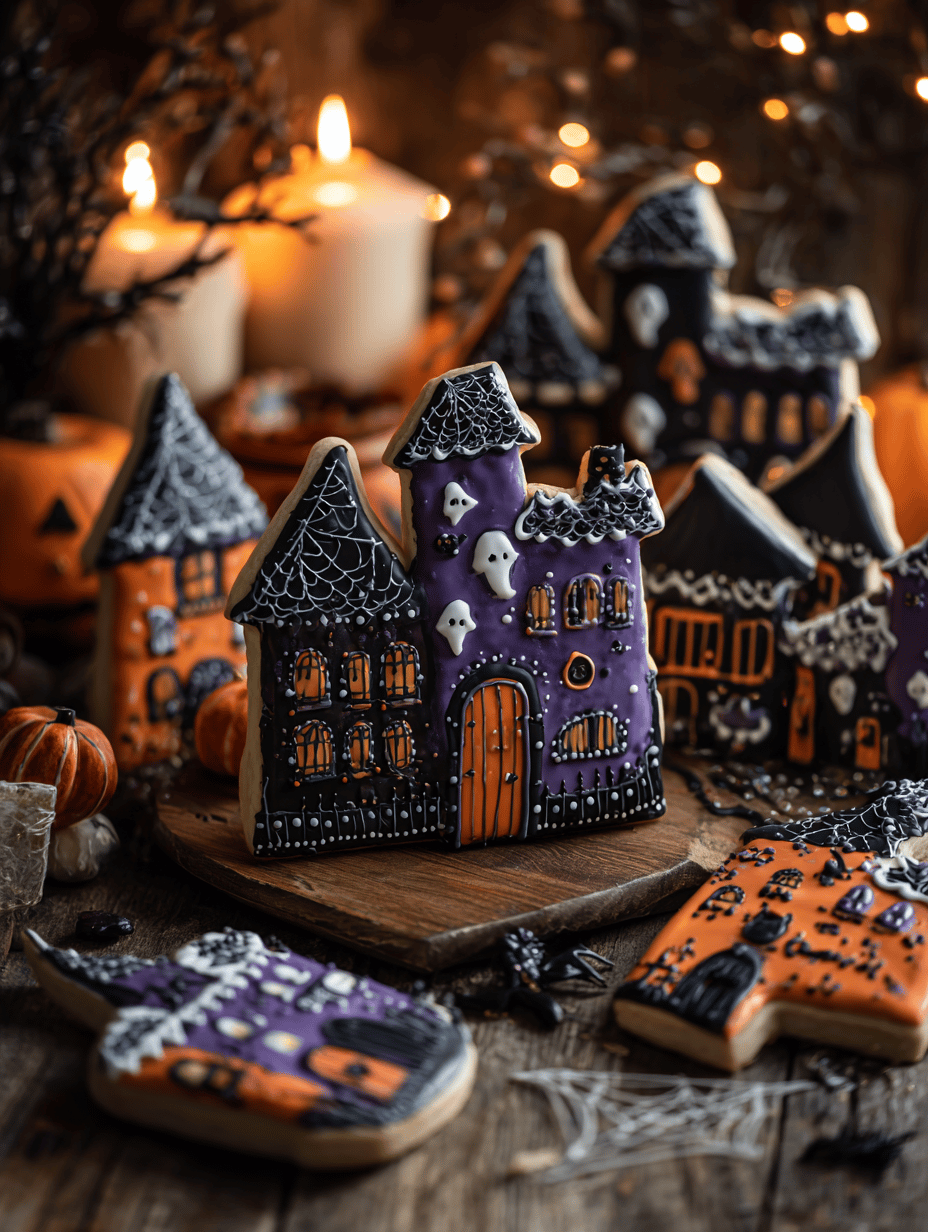
There’s a certain thrill in baking cookies that look like they belong in a haunted house. The mix of buttery sweetness with the eerie cracks and dark chocolate eyes makes each batch feel like a tiny, edible Halloween. I love how simple ingredients can turn into something so delightfully spooky.
Why I keep making these haunted house cookies
They combine simplicity with a touch of spooky fun, perfect for kids and adults alike. The smell of vanilla and melting chocolate fills the house, creating a cozy chaos. Every batch has a chance to be a little more imperfect, a little more charming.
The haunted ingredients and their secrets
- Butter: Creamy, rich, and essential for that tender crumb. Swap for vegan butter if needed.
- Sugar: Grainy sweetness that caramelizes slightly in the oven, giving a subtle crunch.
- Egg: Binding agent and adds moisture; substitute with flaxseed for vegan version.
- Flour: Gives structure; use gluten-free if you prefer.
- Vanilla extract: Brings warmth and depth to the cookie’s flavor—use bourbon vanilla for a smoky hint.
- Chocolate chunks: Dark, oozy centers for the eyes—melted or chopped, your choice.
- Baking powder: Leavening agent that helps the cookies crack just right.
Tools and equipment for spooky baking
- Mixing bowls: For combining your ingredients smoothly.
- Electric mixer or whisk: To cream butter and sugar effortlessly.
- Baking sheet and parchment paper: Ensures even baking and easy cleanup.
- Cooling rack: Prevents sogginess and helps cookies set.
- Cookie scoop or tablespoon: For uniform cookie size and shape.
Step-by-step for creating your haunted treats
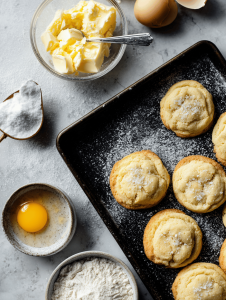
Step 1: Preheat your oven to 180°C (350°F). Line a baking sheet with parchment paper.
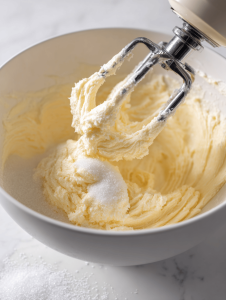
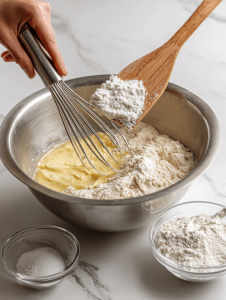
Step 2: In a large bowl, cream together 1 cup of softened butter, 1 cup of sugar, and 1 teaspoon of vanilla extract until light and fluffy.
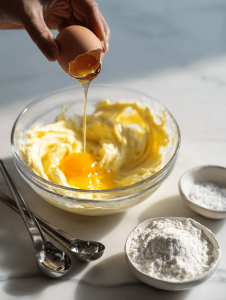
Step 3: Add 1 large egg and beat until fully incorporated.
Step 4: Gradually mix in 2 cups of all-purpose flour, 1/2 teaspoon of baking powder, and a pinch of salt.
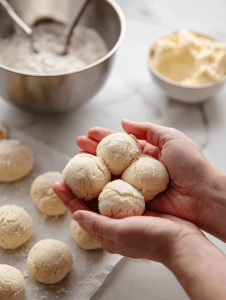
Step 5: Divide dough into small balls, about the size of a walnut. Place on the baking sheet, spacing well apart.
Step 6: Bake for 12-15 minutes, until cookies are golden around the edges and slightly cracked.
Step 7: Let cookies cool on the sheet for 5 minutes, then transfer to a wire rack to cool completely.
Cooking checkpoints and tips to keep in mind
- Cookies should be golden at the edges but still soft in the center.
- Dough balls should be smooth and hold together without cracking.
- Keep an eye on baking time; overbaking will make them too crispy, losing their charm.
- Cooling on the rack is key to prevent sogginess and get that perfect snap.
Common mistakes and how to fix them
- Leaving cookies in the oven too long.? OVER-BAKING your cookies → Remove them at the first sign of cracking and light golden edges.
- Dough too sticky to shape.? Dough sticking to your hands → Chill the dough for 30 minutes, then handle with lightly floured hands.
- Uneven or flat cookies.? Cookies spreading too much → Ensure the dough is chilled and not too warm.
- Poorly set decorations.? Chocolate eyes melting away → Use firm chocolate or chocolate chips, and add them after baking.
Haunted House Cookies
Ingredients
Equipment
Method
- Preheat your oven to 180°C (350°F) and line a baking sheet with parchment paper.
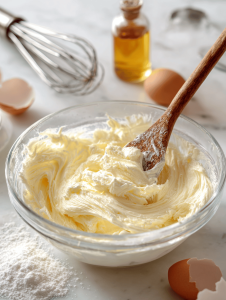
- In a large mixing bowl, cream together the softened butter and sugar using an electric mixer or whisk until the mixture is light, fluffy, and slightly pale, about 3-4 minutes. The sound should be a gentle whir, and the mixture should look smooth.
- Mix in the vanilla extract and egg, beating until fully incorporated. The dough will become more glossy and cohesive.
- In a separate bowl, whisk together the flour, baking powder, and salt. Gradually add these dry ingredients to the wet mixture, mixing on low speed or folding until just combined. The dough will start to come together and feel slightly stiff but soft.
- Using a cookie scoop or spoon, form small dough balls about the size of a walnut and place them evenly spaced on the prepared baking sheet. Gently flatten each ball slightly with your hand to encourage cracking during baking.
- Bake the cookies in the preheated oven for 12-15 minutes, or until the edges are golden brown and the cookies have cracked beautifully, resembling haunted house walls. The cookies will smell buttery and sweet with a hint of vanilla.
- Remove the baking sheet from the oven and let the cookies cool on the sheet for 5 minutes. They will firm up slightly as they cool and develop their characteristic cracks.
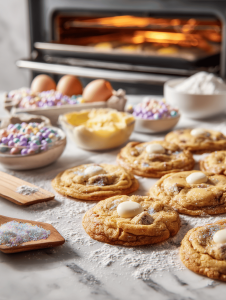
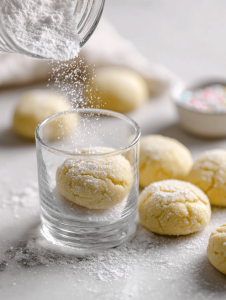
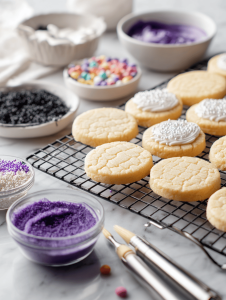
- Transfer the cookies to a wire rack to cool completely. Once cooled, press a few dark chocolate chunks into the centers of each cookie to create the spooky eyes and oozing centers.
- Let the chocolate set for a few minutes, then your haunted house cookies are ready to serve! Enjoy the crunchy edges, tender crumb, and playful dark chocolate accents.
Notes

Hi, I’m Hannah Reynolds, the heart behind Seasoning Therapist. I believe food can comfort, restore, and gently reset us after a long day. I started Seasoning Therapist with one simple idea in mind: cooking is not just about feeding the body, it is about caring for the mind too. The right seasoning can change the mood of a dish, and sometimes even the mood of the person eating it. This blog is where I combine my love for thoughtful cooking with my belief that the kitchen can be a place of healing.
