The secret to perfect scrambled eggs isn’t just about the eggs themselves but how you cook them. Using a non-stick pan and gentle heat transforms this simple dish into something luxuriously creamy, almost custard-like. It’s that slow, patient approach that makes all the difference.
I’ve learned that rushing the process or turning up the heat too high results in eggs that are dry, rubbery, and less satisfying. Instead, I focus on low, steady warmth and constant stirring—like coaxing out a silky, tender bite that melts on your tongue. It’s honestly more about technique than ingredients, and that makes all the difference in the world.
Focusing on how the choice of pan and gentle heat transforms simple scrambled eggs into a luxuriously creamy, almost custard-like bite, emphasizing technique over ingredients.
The overlooked art of gentle heat
- Cooking these eggs reminds me of lazy Sunday mornings at my grandma’s house, the smell of butter filling the air.
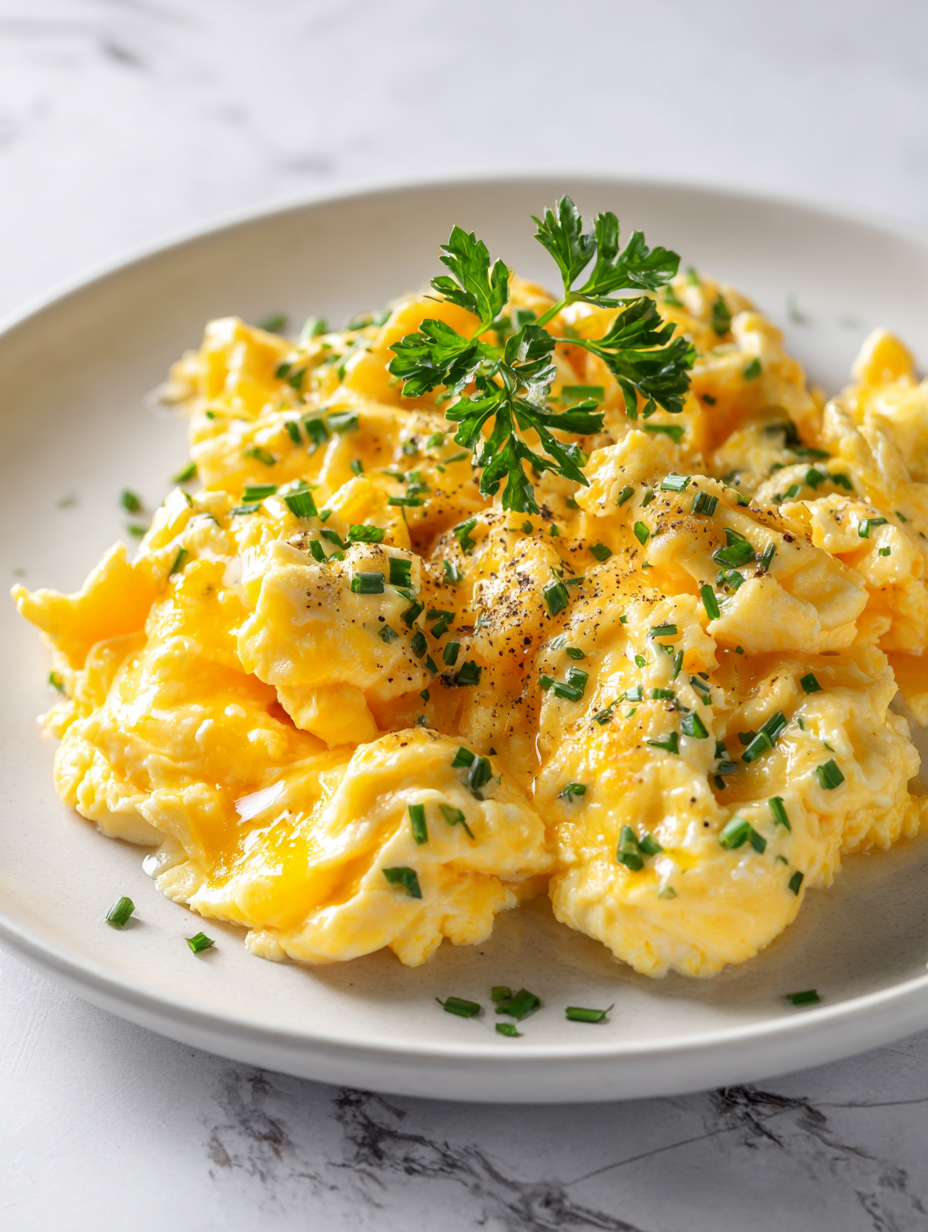
- There’s a quiet pride in getting the perfect soft, slightly creamy scramble—I know I nailed it when they shimmer with a gentle gloss.
- I used to rush through scrambled eggs, but now I savor the slow, patient stirring—each bite feels like a small victory.
- Nothing beats the simple joy of fluffy eggs, especially when they’re cooked just right—soft, moist, with a hint of buttery richness.
The art of gentle heat
Making perfect scrambled eggs has always been a quiet obsession for me. I remember the mornings when my mom would cook them slowly, the gentle sizzle filling the kitchen, and the eggs turning fluffy and custard-like. That simple act of patience turned scrambled eggs into something more than just breakfast—it became a moment of calm and care. I started to realize it’s not about the eggs or even the pan, but about the gentle heat and slow stirring that coax out their softest, most tender form.
Historical and cultural trivia
- The technique of slowly cooking eggs to achieve a custard-like texture dates back to French culinary traditions, emphasizing patience and gentle heat.
- In the 1950s, some chefs popularized the use of double boilers for eggs, aiming to create an ultra-smooth, creamy scramble.
- Eggs have been a breakfast staple across cultures, but the method of gently stirring them into silky curds became a symbol of refined home cooking in Europe.
- The word ‘scramble’ for eggs originated in the early 20th century, reflecting the informal, hurried way many cooked them before the slow, gentle methods gained popularity.
Key ingredients for perfect eggs
- Eggs: I prefer using large, fresh eggs—they’re naturally richer and more tender, giving your scramble a silky texture. If yours are a few days old, just whisk a little milk or cream to boost creaminess.
- Salt: A pinch of sea salt right into the eggs amplifies their flavor and balances the richness. Don’t overdo it—start small, then taste and adjust if needed.
- Butter: I always use unsalted butter, melted gently in the pan—its nutty aroma makes a noticeable difference. For a dairy-free tweak, olive oil offers a lighter, slightly fruity note.
- Cream or Milk: A splash of heavy cream or whole milk makes the eggs extra plush and tender. Skip it if you want lighter eggs, but don’t skip the fat—your eggs won’t be as luscious.
- Pepper: Freshly cracked black pepper adds a subtle bite, especially when sprinkled just before serving. If you prefer a milder flavor, go easy or skip entirely.
- Optional Add-ins: Chives, cheese, or sautéed mushrooms can elevate your scramble. Add cheese at the end for melty richness, but keep delicate herbs for fresh brightness after cooking.
Spotlight on key ingredients
Eggs:
- I prefer large, fresh eggs—they’re naturally richer and more tender, giving your scramble a silky texture. If yours are a few days old, just whisk a little milk or cream to boost creaminess.
- Salt: A pinch of sea salt right into the eggs amplifies their flavor and balances the richness. Don’t overdo it—start small, then taste and adjust if needed.
Butter and Dairy:
- Butter: I always use unsalted butter, melted gently in the pan—its nutty aroma makes a noticeable difference. For a dairy-free tweak, olive oil offers a lighter, slightly fruity note.
- Cream or Milk: A splash of heavy cream or whole milk makes the eggs extra plush and tender. Skip it if you want lighter eggs, but don’t skip the fat—your eggs won’t be as luscious.
Notes for ingredient swaps
- Dairy-Free: Swap butter for olive oil or coconut oil. The eggs will be slightly less rich but still creamy.
- Vegan: Use a plant-based butter or margarine and a splash of almond or soy milk for added moisture.
- Creamy Texture: Replace heavy cream with Greek yogurt or cashew cream for a tangy, silky finish.
- Flavor Boost: Add a dash of smoked paprika or hot sauce instead of salt for a smoky or spicy twist.
- Lower Fat: Omit butter altogether and cook eggs in a non-stick pan with a little water or broth, though expect a lighter texture.
- Herb Variations: Fresh dill or basil can replace chives for different herbal brightness, especially in summer.
- Salt Alternative: Use soy sauce or miso paste in the eggs for an umami kick, just start with small amounts.
Equipment & Tools
- Non-stick skillet: Prevents sticking and allows gentle heat control.
- Silicone spatula: Gently stirs eggs without damaging curds.
- Whisk: Thoroughly combines eggs and liquids for a smooth mixture.
- Measuring spoons: Ensures accurate addition of cream and seasoning.
- Stove with low heat setting: Provides gentle, consistent warmth essential for custard-like texture.
Step-by-step guide to perfect eggs
- Gather a small non-stick skillet, preferably 20-25cm (8-10 inches), and a silicone spatula. Set your stove to very low heat—about 90°C (200°F).
- Crack 3 large eggs into a bowl. Add a pinch of salt and a splash of cream or milk (about 1 tablespoon). Whisk vigorously until completely blended and slightly frothy, about 20 seconds.
- Place the skillet on the stove. Add 1 tablespoon of unsalted butter. Let it melt gently, swirling until it just starts to foam but doesn’t brown, roughly 30 seconds.
- Pour the beaten eggs into the pan. Let them sit undisturbed for about 10 seconds, then start stirring slowly with the spatula—gentle, figure-eight motions. Keep the heat low.
- Continue stirring constantly, scraping the bottom and sides of the pan. After 30-40 seconds, the eggs will begin to thicken and form soft curds. Watch for a slightly glossy, custard-like appearance.
- If the eggs start to look dry or crackle loudly, lower the heat further or remove from heat temporarily. If eggs are too runny, keep stirring for another 10 seconds. The process should take about 2-3 minutes total.
- Once the eggs are softly set but still moist and creamy, remove the pan from heat. Let them rest for 10 seconds to finish setting gently. Taste and adjust seasoning if needed.
- Plate immediately, optionally sprinkle with fresh herbs or a grind of black pepper. Serve while still warm and silky.
Serve immediately while still warm and silky. Optional: garnish with fresh herbs or a pinch of pepper. Enjoy the soft, custardy texture that’s achieved through patience and low heat.
How to Know It’s Done
- Eggs are just set, slightly glossy, not dry or crumbly.
- The mixture jiggles slightly when moved, indicating softness.
- No visible liquid egg remains; curds are tender and moist.
Creamy Soft-Scrambled Eggs
Ingredients
Equipment
Method
- Crack the eggs into a bowl, then add a splash of heavy cream and a pinch of sea salt.
- Whisk vigorously until the mixture is completely blended, slightly frothy, and uniform in color—about 20 seconds.
- Place your non-stick skillet over very low heat on the stove, about 200°F (90°C), and add the melted butter, swirling to coat the bottom.
- Pour the whisked eggs into the warm skillet. Let them sit undisturbed for about 10 seconds until you see gentle bubbles and just a hint of setting at the edges.
- Begin stirring slowly with your silicone spatula in gentle figure-eight motions, scraping the bottom and sides of the pan. The eggs will start to thicken and look glossy.
- Continue stirring constantly, maintaining the low heat. As the eggs gradually form soft curds, they will become more opaque and creamy, resembling soft custard.
- Once the eggs are mostly set but still slightly runny and glossy, remove the pan from heat. The residual warmth will finish cooking them gently, so don’t overcook.
- Give the eggs a final gentle stir, then sprinkle with freshly cracked black pepper or additional herbs if desired. Serve immediately while warm, soft, and silky.
Notes
Tips for silky scrambled eggs
- Bolded mini-head: Use low heat → Gentle warmth prevents eggs from drying out and ensures a custard-like texture.
- Bolded mini-head: Keep stirring → Constant, slow movement creates soft, even curds without overcooking.
- Bolded mini-head: Stop before dry → Eggs should be slightly runny and glossy when removed from heat to finish setting off-heat.
- Bolded mini-head: Add butter last → Stir in a small pat of butter at the end for extra richness and shine.
- Bolded mini-head: Use a silicone spatula → Gently scrape the bottom and sides, avoiding rough motions that break curds.
- Bolded mini-head: Adjust heat as needed → If eggs crackle loudly, lower heat immediately to maintain tenderness.
- Bolded mini-head: Serve immediately → The texture is best when eggs are still warm and slightly creamy, right off the stove.
Common mistakes and how to fix them
- FORGOT to lower heat → Eggs overcooked, become rubbery and dry.
- DUMPED eggs directly into hot pan → Curds separate, texture becomes grainy.
- OVER-TORCHED eggs → Turn off heat immediately, add a splash of cold water to stop cooking.
- MISSED stirring constantly → Eggs dry out quickly, become tough and crumbly.
Quick fixes and pantry swaps
- When eggs look watery → Splash cold water into the pan and stir for 5 seconds.
- If eggs are overcooked → Patch with a teaspoon of cold butter, stir, and serve immediately.
- DUMPED eggs into hot pan → Lower heat immediately and stir gently to recover creaminess.
- When eggs stick or burn → Shield with a small piece of parchment or reduce heat further.
- Splash in a little milk or cream → Rescue dry eggs, adding moisture and shine.
Prep, store, and reheat tips
- Whisk the eggs with salt and a splash of cream or milk ahead of time; keep refrigerated for up to 24 hours. The mixture will be slightly frothy and ready to pour for quick cooking.
- Assemble your pan, spatula, and ingredients beforehand. Having everything within reach speeds up the process and keeps your eggs from overcooking.
- Store any leftover scrambled eggs in an airtight container in the fridge for up to 2 days. Expect a firmer, slightly drier texture upon reheating.
- Reheat gently in a non-stick pan over low heat, stirring constantly. Expect a softer, slightly shrunk texture, and add a splash of milk or water to revive creaminess.
- For best flavor, reheat within 2 days. Sensory cue: eggs should be moist and warm, with a subtle aroma of butter and eggs, not rubbery or dry.
Top questions about perfect scrambled eggs
1. Should I use fresh eggs or older ones?
Use fresh eggs for a richer, more tender scramble. Older eggs can be made creamier with a splash of milk or cream.
2. What temperature should I cook scrambled eggs at?
Cooking on very low heat and stirring constantly creates the soft, custard-like texture I love. High heat makes them rubbery.
3. When do I know my eggs are done?
Remove the eggs from the heat just before they look fully set—they’ll finish cooking off-heat and stay moist and glossy.
4. Should I add butter during or after cooking?
Adding a pat of butter at the end adds richness and shine, making the eggs silkier and more flavorful.
5. How should I stir the eggs for the best texture?
Stir slowly and constantly with a silicone spatula. Scraping the bottom gently prevents overcooking and keeps eggs silky.
6. What if my eggs are overcooked and dry?
If eggs turn dry or crumbly, lower the heat immediately and remove from stove to finish gently off-heat.
7. Can I omit the dairy for a lighter scramble?
A splash of cream or milk makes eggs extra tender and lush. Skip it for lighter eggs, but don’t omit the fat entirely.
8. When should I add salt?
Add salt directly into the eggs before cooking to enhance flavor. Season to taste just before serving.
9. What equipment is best for perfect scrambled eggs?
Using a non-stick pan and low, steady heat prevents sticking and overcooking, leading to silky results.
10. How do I reheat scrambled eggs without drying them out?
Reheat leftovers gently over low heat, stirring constantly. Expect a firmer texture but still moist if done carefully.
Mastering the art of gentle heat and patience turns simple eggs into a creamy, luxurious breakfast. It’s a small act of care that pays off in every silky bite.
These scrambled eggs remind me that sometimes, slow and steady really does win the race. It’s a quiet pleasure worth every stir and minute of waiting.

Hi, I’m Hannah Reynolds, the heart behind Seasoning Therapist. I believe food can comfort, restore, and gently reset us after a long day. I started Seasoning Therapist with one simple idea in mind: cooking is not just about feeding the body, it is about caring for the mind too. The right seasoning can change the mood of a dish, and sometimes even the mood of the person eating it. This blog is where I combine my love for thoughtful cooking with my belief that the kitchen can be a place of healing.
