Scrambled eggs might seem straightforward, but mastering the gentle heat technique turns them into something truly luxurious. It’s about patience, slowly coaxing the eggs into a silky, creamy consistency that feels like a small reward in the morning. I’ve learned that rushing this process only results in rubbery curds, and nobody needs that.
This recipe is my go-to for weekends when I want a breakfast that feels indulgent without much fuss. The secret is controlling the heat and stirring steadily, so the eggs stay soft and tender. It’s a simple pleasure, but one that’s worth every extra minute of attention. Plus, it’s a reminder that sometimes, the slowest approach yields the best texture.
Focusing on the overlooked technique of gentle heat control for perfectly creamy scrambled eggs, highlighting how patience and temperature finesse transform this simple dish into something silky and rich.
The overlooked art of gentle heat
- I used to rush through breakfast, but learning this gentle technique made mornings feel calmer and more intentional.
- Nothing beats the quiet satisfaction of perfect, softly curdled eggs that melt in your mouth, especially after a hectic week.
- A simple reminder that patience in cooking often leads to the most comforting, creamy bites.
- These eggs remind me of lazy weekends at my grandma’s house, where breakfast was slow and full of love.
- Every time I make them, I feel a small thrill seeing that silky texture come together with just the right heat.
The story behind this recipe
- Making scrambled eggs this way is my little morning rebellion—slowing down, paying attention, letting the heat do its work. I remember one chaotic weekend when I was in a rush, and the eggs turned into rubber. That day, I realized there’s a quiet magic in patience, in gently coaxing the eggs into silky softness.
- Ever since, I’ve kept to this slow, steady method. It’s become a ritual that transforms a simple breakfast into a mindful pause. The process feels almost meditative, and the reward is a spoonful of eggs that’s luxuriously tender, like a small toast to taking it easy.
- heading: The overlooked art of gentle heat
Trivia and historical tidbits
- Eggs have been a dietary staple since ancient times, with evidence of domestication dating back thousands of years in the Middle East.
- The technique of gently scrambling eggs gained popularity in French cuisine, emphasizing patience and precise heat control for creamy results.
- In many cultures, scrambled eggs symbolize comfort and simplicity, often served as a breakfast staple that’s quick to prepare.
- The term ‘scrambled’ likely comes from the act of stirring or ‘scrambling’ the eggs during cooking, a technique that evolved over centuries.
- Modern chefs have revived the slow and gentle method, highlighting its ability to produce eggs that are luxuriously silky rather than rubbery.
Key ingredients and tips
- Eggs: I always use large, farm-fresh eggs—more flavor and better texture. You can try organic, but avoid super fresh if you want easier peeling later.
- Butter: I prefer a generous pat of butter for richness and a slightly nutty aroma. Swap with olive oil if you want a lighter, fruitier flavor—just be mindful of the lower smoke point.
- Salt: I add salt early to help break down the proteins, making the eggs creamier. For a subtle twist, sprinkle freshly ground black pepper just before serving.
- Milk or Cream: I like a splash of heavy cream for extra silkiness. If you want dairy-free, try a dash of almond or oat milk—won’t be quite as luxurious, but still good.
- Seasonings: I keep it simple with just salt and pepper, but a pinch of smoked paprika or fresh herbs can brighten the dish. Use sparingly, so they don’t overpower the eggs’ gentle flavor.
- Optional Mix-ins: Chopped chives, soft cheese, or even a tiny spoon of crème fraîche can elevate the eggs. Add right at the end, just enough to gently fold in for added richness.
Spotlight on key ingredients
Eggs:
- I prefer farm-fresh eggs for their richer flavor and better texture. They cook up creamier and more vibrant yellow.
- They behave differently depending on freshness; older eggs are easier to peel if you’re making deviled eggs or poached, but fresher eggs give a better scramble.
Butter:
- I love the nutty aroma it imparts and how it melts into the eggs. It helps achieve that silky, rich finish, especially if you don’t rush the process.
- Using a good quality, unsalted butter means you can control the salt and get a cleaner, clearer flavor that enhances the eggs without overpowering.
Notes for ingredient swaps
- Dairy-Free: Swap butter for a neutral oil like avocado or canola. It won’t have the same nutty aroma but still cooks evenly.
- Plant-Based: Use coconut oil or vegan butter instead of butter. Expect a slight coconut aroma and richer mouthfeel.
- Cream Alternatives: Replace heavy cream with coconut cream or cashew cream for a dairy-free, velvety texture.
- Salt: Use sea salt or Himalayan pink salt for a more mineral-rich flavor. Adjust quantity to taste, as some salts are more potent.
- Pepper: Substitute black pepper with white pepper for a milder, less visually conspicuous seasoning, especially in lighter-colored eggs.
- Herbs & Spices: Fresh chives, parsley, or dill can be added; dry herbs work too but are less vibrant. Add at the end for freshness.
- Add-ins: Cheeses like feta or goat cheese can be substituted with soft, melty plant-based cheeses for vegan options or omitted for a cleaner taste.
Equipment & Tools
- Non-stick skillet: Ensures eggs cook evenly without sticking.
- Silicone spatula: For gentle stirring and folding to maintain silky texture.
- Small bowl: To whisk eggs with seasonings and liquids.
- Whisk or fork: To beat eggs until uniform and frothy.
Step-by-step guide to perfect eggs
- Gather your equipment: a non-stick skillet, a silicone spatula, a small bowl, and a whisk or fork. The skillet should be medium-sized, around 20cm (8 inches), for gentle heat distribution.
- Crack 3 large eggs into the bowl. Add a pinch of salt and a splash (about 1 tablespoon) of heavy cream or milk. Whisk steadily for about 20 seconds until the mixture is uniform and slightly frothy.
- Place your skillet over low heat—about 90°C (194°F). Add a generous knob of butter (about 1 tablespoon), allowing it to melt gently and coat the pan evenly.
- Pour the egg mixture into the skillet. Let it sit undisturbed for just 10–15 seconds, then start stirring slowly with your spatula, scraping from the edges toward the center.
- Continue stirring gently, maintaining a low temperature. Every 20–30 seconds, lift and fold the eggs, allowing the curds to form softly. Keep the heat low enough to prevent any crackling or browning.
- Watch for the eggs to turn from glossy to matte and creamy, with small, soft curds. If they start to look dry or crackle loudly, reduce the heat further or remove from heat temporarily.
- When the eggs are mostly set but still slightly runny—about 2 minutes total—remove the skillet from heat. The residual warmth will finish the cooking.
- Transfer the eggs to a plate or bowl promptly. Let them rest for 30 seconds, then give a gentle stir to settle the curds. Serve immediately for the best silky texture.
Gently transfer eggs to a warm plate. Rest for 30 seconds, then stir lightly to settle. Serve immediately with your favorite toast or fresh herbs.
How to Know It’s Done
- Eggs are soft, slightly glossy, and form small, tender curds.
- No browning or crackling—just a gentle, uniform shimmer.
- A probe inserted into the eggs reads around 75°C (167°F), indicating doneness without overcooking.
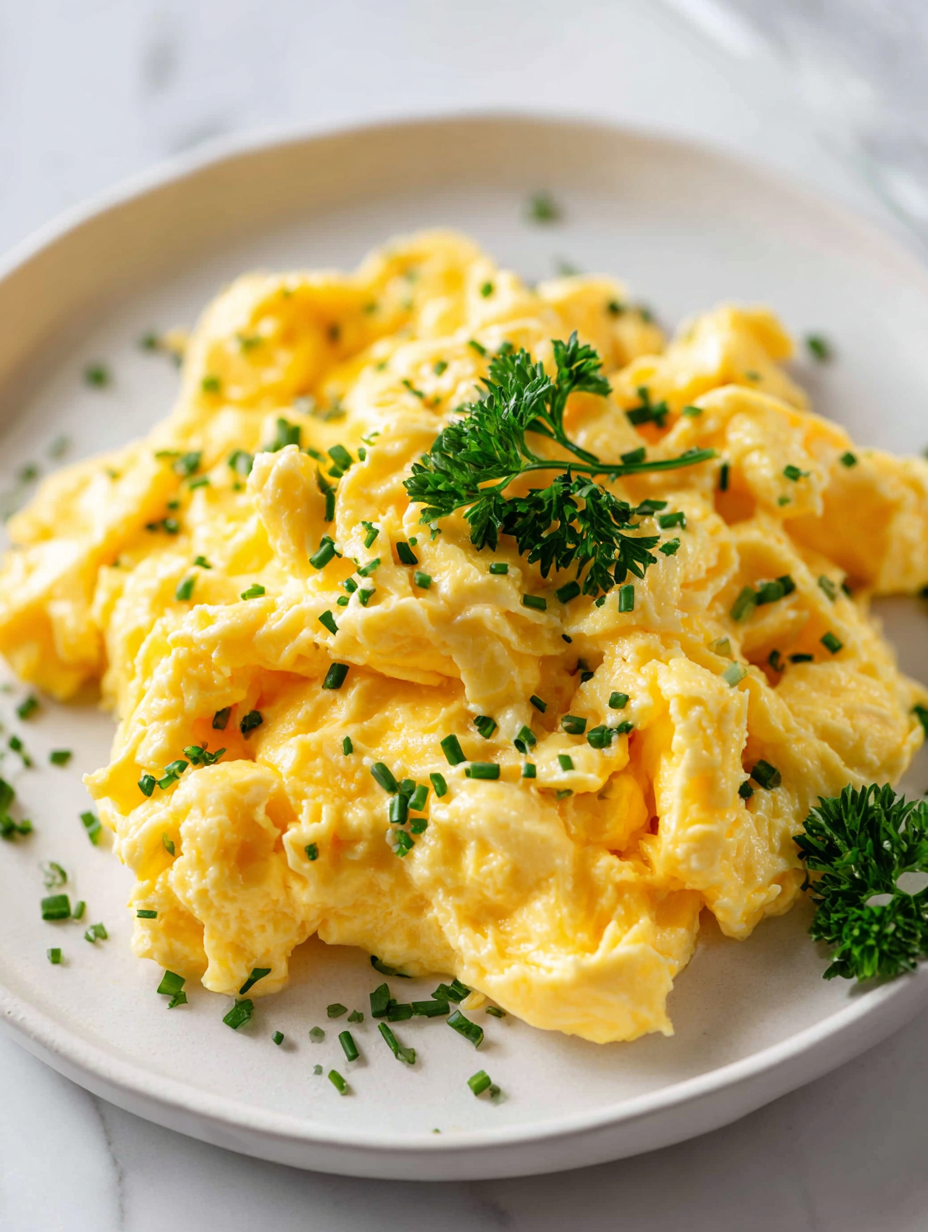
Silky Gentle-Heat Scrambled Eggs
Ingredients
Equipment
Method
- Crack the eggs into a small bowl, then add a pinch of salt and a splash of heavy cream. Whisk vigorously for about 20 seconds until the mixture is uniformly frothy and slightly pale.
- Place your non-stick skillet over very low heat, around 90°C (194°F). Add the butter and let it melt gently, coating the entire surface with a soft, fragrant layer of butter.
- Pour the egg mixture into the skillet, letting it sit quietly for about 10–15 seconds until just starting to set at the edges. You should see the edges firm up slightly and a gentle aroma develop.
- Gently stir the eggs using your silicone spatula, scraping the cooked parts from the edges and folding them toward the center. Keep the heat low and stir slowly and steadily, avoiding rapid movements.
- Continue stirring gently every 20–30 seconds, watching the eggs turn from glossy to a matte, creamy texture. Small, soft curds will begin to form and look luxuriously moist.
- When the eggs are mostly set but still slightly runny—about 2 minutes in—you can remove the skillet from the heat. The residual warmth will finish cooking the eggs to perfection.
- Give the eggs a gentle stir to incorporate any remaining moisture, and let them rest for about 30 seconds to settle into silky, tender curds.
- Transfer the eggs to your plate, sprinkle with freshly ground black pepper, and serve immediately. Enjoy the rich, silky texture that results from this slow, gentle method.
Notes
Tips for perfect scrambled eggs
- Use low heat → prevents eggs from becoming rubbery and keeps them silky.
- Stir continuously → gentle, steady motion promotes creamy curds and even cooking.
- Add eggs to the pan when butter just melts → ensures even heat absorption and prevents sticking.
- Remove from heat slightly before they are fully set → residual warmth finishes the job smoothly.
- Use a silicone spatula → for gentle folding and scraping without breaking the curds.
- Keep the eggs slightly glossy and soft → for the perfect creamy texture, avoid overcooking.
- Incorporate a splash of cream or milk → for extra richness and a velvety mouthfeel.
Common mistakes and how to fix them
- FORGOT to lower heat → Eggs turn rubbery; fix by cooking on very low heat.
- DUMPED eggs too early → Let them sit longer for creamier curds before stirring.
- OVER-TORCHED eggs → Remove from heat sooner; residual heat will finish cooking gently.
- MISSED stirring frequency → Stir steadily every 20-30 seconds to prevent curd formation.
Quick fixes and pantry swaps
- When eggs are too dry, splash with a little cold water and stir gently.
- Dumped eggs too quickly? Lower heat and stir continuously for creamier texture.
- Over-torched eggs? Remove from heat immediately and add a pat of butter to soften.
- Splash in a bit of milk or cream if eggs become rubbery during cooking.
- Patch a broken curd by adding a small splash of hot water and stirring gently.
Prep, store, and reheat tips
- Prep your eggs: Crack and beat eggs with salt and cream ahead of time; store covered in the fridge for up to 24 hours. The mixture stays fresh and ready to cook, with no separation or off-smell.
- Butter and seasonings: Measure out butter and any herbs or spices in advance. Keep them at room temperature or in small containers in the fridge. They’ll be easy to add for an instant flavor boost.
- Refrigerated leftovers: Cooked scrambled eggs can be stored in an airtight container in the fridge for up to 2 days. Expect a slightly firmer texture and milder flavor upon reheating.
- Reheating tips: Gently rewarm in a non-stick pan over low heat, stirring constantly. The eggs will shimmer and regain some creaminess, but won’t be as fluffy as fresh. Add a splash of milk or butter if needed to restore moisture.
Top questions about scrambled eggs
1. Should I use fresh eggs for scrambled eggs?
Use fresh eggs for better flavor and a creamier texture, but slightly older eggs peel easier if you’re making deviled eggs or poached. Freshness affects how they cook and set.
2. Can I make scrambled eggs dairy-free?
Add a splash of milk or cream to make eggs extra silky. If you prefer dairy-free, try almond or oat milk for a lighter, less rich result.
3. What heat should I use for perfect scrambled eggs?
Cook eggs on very low heat, around 90°C (194°F), stirring steadily. They should stay glossy and soft, not dry or crumbly. Remove from heat just before they’re fully set.
4. How should I stir scrambled eggs?
Stir gently and continuously, folding from the edges to the center. This slow, steady motion helps achieve that silky, custardy texture. Avoid high heat or vigorous stirring.
5. What tools are best for making scrambled eggs?
Use a non-stick skillet and a silicone spatula for gentle folding and scraping. Keep the heat low, and remove eggs from heat when slightly runny—residual heat finishes cooking.
6. How do I fix overcooked scrambled eggs?
If eggs turn rubbery, lower the heat immediately and stir more gently. Overcooking? Remove from heat early and add a little butter or cream to soften.
7. When should I add salt and pepper?
Add seasonings like salt early to help break down proteins, making eggs creamier. Finish with freshly ground pepper or herbs just before serving for fresh flavor.
8. Can I store and reheat scrambled eggs?
Refrigerate leftover cooked eggs in an airtight container for up to 2 days. Reheat gently over low heat, stirring constantly, until just warmed and shimmering.
9. How can I make eggs fluffier or creamier?
For fluffier eggs, whisk vigorously to incorporate air, then cook on low heat. For creamier eggs, add more cream or butter and stir slowly.
10. How do I know when scrambled eggs are ready?
When eggs look glossy, form small curds, and reach about 75°C (167°F) internally, they’re done. They should be soft, moist, and slightly shiny—no rubbery texture.
These eggs are a quiet reminder that patience and gentle heat can turn a simple dish into something unexpectedly luxurious. There’s a subtle joy in watching them softly set, feeling that silky texture melt on your tongue. It’s a small act of kindness we can afford every morning, if only we take the time.
In a busy world, this gentle approach to scrambled eggs offers a moment of calm and a breakfast that feels like a true treat. No matter how many variations you try, this method keeps bringing me back to that simple, rich comfort—an everyday reminder to slow down and savor.

Hi, I’m Hannah Reynolds, the heart behind Seasoning Therapist. I believe food can comfort, restore, and gently reset us after a long day. I started Seasoning Therapist with one simple idea in mind: cooking is not just about feeding the body, it is about caring for the mind too. The right seasoning can change the mood of a dish, and sometimes even the mood of the person eating it. This blog is where I combine my love for thoughtful cooking with my belief that the kitchen can be a place of healing.
