There’s something almost hypnotic about watching pork ribs caramelize under the broiler, the surface turning a deep, glossy amber. It’s that final burst of heat that transforms tender meat into something crispy and sticky, coated in a shimmering glaze that invites a finger lick. I love how the smell of caramelized sugars mingles with smoky pork, filling the kitchen with a heady aroma that’s hard to beat.
This recipe is about embracing that visual and sensory payoff. I’ve cooked ribs plenty of ways, but nothing beats the thrill of seeing those edges go from tender to irresistibly crisp, all while maintaining a juicy interior. It’s a messy, glorious process—one that rewards patience and a watchful eye, especially during that last broil.
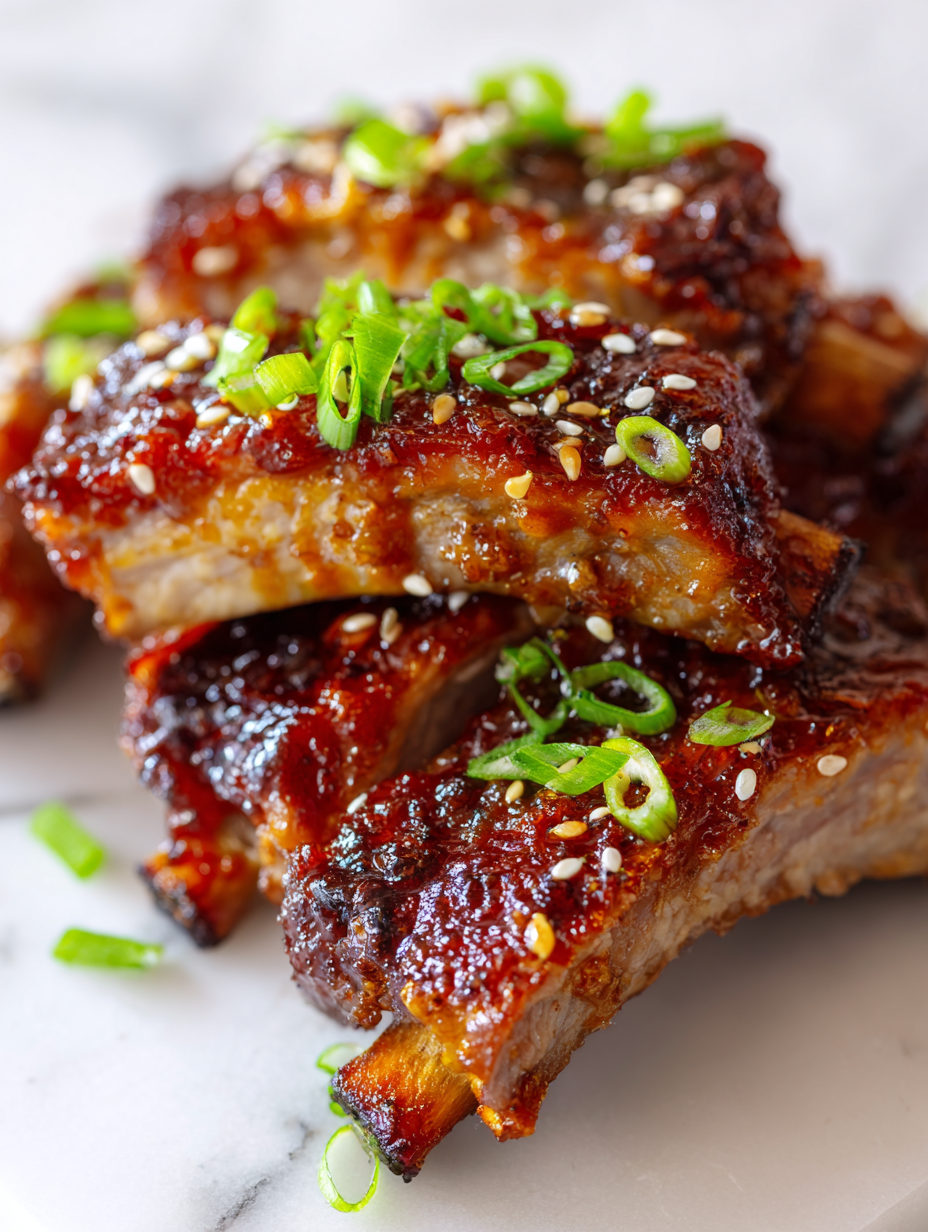
Focusing on the sticky, caramelized glaze that forms during the final broil, highlighting the visual and sensory appeal of glossy, crispy edges.
The allure of caramelized edges
- Watching the glaze turn sticky and deep amber makes me feel like I’ve nailed something special.
- The smell of caramelized sugars and smoky pork instantly transports me back to summer BBQs with friends.
- I get surprisingly proud when I manage to get that perfect crispy edge without drying out the meat.
- There’s a chaotic joy in scraping off the sticky bits that cling to my fingers after every bite.
- Sometimes, I just stand there for a moment, lost in the aroma, feeling grateful for simple, honest food.
The story behind this recipe
- This recipe was born out of a lazy Sunday craving for something intensely satisfying, sticky, and smoky. I remember the first time I tried to make ribs at home, fumbling through different marinades and cooking times, but it was the glaze that finally made it memorable. Ever since, I’ve been obsessed with nailing that perfect caramelized, sticky finish that makes your fingers sticky and your taste buds sing.
- Over the years, I’ve tweaked my approach, experimenting with different sugars and broiling techniques. It’s become a bit of a ritual—waiting for that moment when the glaze bubbles and turns glossy, then rushing to get it under the broiler before it burns. It’s messy, loud, but so worth that crackling, caramelized crust that forms at the end.
- heading: The magic of caramelized edges
Trivia and Cultural Notes
- Pork ribs have been a staple in many cultures, with variations from Chinese char siu to American barbecue styles.
- The caramelized, sticky glaze became popular in the West during the rise of barbecue joints in the 20th century.
- Historically, ribs were cooked using open-fire methods, which helped develop their signature smoky, sticky crust.
- The use of sugar or honey in glazes dates back centuries, originally to preserve meat and add flavor.
- In some Asian cuisines, sticky pork dishes are also celebrated with sweet soy and aromatic spices, creating a global tapestry of flavors.
Ingredient breakdown: key components
- Pork ribs: I favor a good rack with plenty of marbling, which keeps the meat juicy and flavorful during cooking. If yours are leaner, consider marinating in a bit of oil and spices overnight.
- Soy sauce: It adds a savory umami backbone that balances sweetness. Swap with tamari for gluten-free, but expect a slightly different depth of flavor.
- Brown sugar: The foundation of that sticky glaze, it melts into the sauce, giving it that rich, caramelized shine. You can substitute honey or maple syrup, but keep an eye on the sweetness level to avoid burning.
- Garlic: I love smashing and mincing it fresh for a punch of aroma. Dried garlic powder works in a pinch but loses that sharp, fresh zing — add it earlier in the cooking to mellow.
- Apple cider vinegar: Brightens the glaze with a tangy lift. Lemon juice can be a quick swap if you’re out, but it’s a bit sharper, so use sparingly.
- Honey: For extra sticky sweetness, I drizzle a little honey in the glaze at the end. Maple syrup can work as a more subtle alternative, with a hint of earthiness.
- Sesame seeds: I sprinkle these on right before serving for a nutty crunch, but toasted crushed peanuts do a similar job if you’re avoiding seeds.
Spotlight on key ingredients
Brown Sugar:
- I love how it melts into the glaze, creating that deep, sticky caramel layer that’s both sweet and smoky. If you’re out, honey works but won’t develop quite the same richness.
- Soy sauce: It adds that savory umami backbone that makes the glaze pop. Swap with coconut aminos for a milder, slightly less salty version—still gives that rich, salty depth.
Pork Ribs:
- I prefer a well-marbled rack, which stays juicy through the long bake. Leaner ribs can dry out, so consider marinating or slow-cooking to keep them tender.
- Apple cider vinegar: Brightens the glaze with a tang that balances sweetness. Lemon juice can be a quick substitute, but it’s sharper—use sparingly to avoid overpowering.
Notes for ingredient swaps
- Dairy-Free: Swap soy sauce with coconut aminos for a similar salty, umami punch that’s friendly to dairy allergies.
- Sweetener: Replace brown sugar with coconut sugar or maple syrup; expect a slightly different caramelization and flavor depth.
- Vinegar: Use lemon juice or white wine vinegar instead of apple cider vinegar for a sharper, brighter tang.
- Soy Sauce: Tamari makes a great gluten-free option, with a richer, less salty taste; keep an eye on salt levels.
- Honey: Maple syrup can be a lovely, earthy alternative but might add a subtle woody note to the glaze.
- Spicy Kick: Add a dash of Sriracha or hot sauce if you want a smoky spice that still clings sticky and sweet.
- Garnish: Sesame seeds can be swapped for crushed peanuts or chopped scallions for different texture and color.
Equipment & Tools
- Oven: For baking and broiling the ribs.
- Baking dish: Holds the ribs during slow cooking.
- Aluminum foil: Covers the dish for even cooking and moisture retention.
- Basting brush: Applying the glaze evenly over the ribs.
- Tray or broiler pan: For the final broil to achieve caramelization.
- Tongs: Handling hot ribs and turning them during broiling.
Step-by-step guide to sticky ribs
- Preheat your oven to 150°C (300°F). Gather a baking dish large enough for the ribs and a foil to cover it. Start by trimming excess fat from the ribs, leaving a thin layer for flavor.
- Mix your marinade or dry rub—paprika, garlic powder, salt, pepper, a splash of soy sauce—and rub it all over the ribs. Let sit for at least 30 minutes, or overnight if you have time.
- Place the ribs in the baking dish, bone side down. Cover tightly with foil. Bake for 2.5 to 3 hours until the meat is tender and pulling away from the bones. The aroma of cooked pork should be warm and inviting.
- Carefully remove from the oven. Mix together your glaze: soy sauce, brown sugar, minced garlic, apple cider vinegar, and a touch of honey. Brush generously over the ribs.
- Transfer to a broiler-safe tray or keep in the baking dish. Broil on high (around 260°C/500°F) for 3-5 minutes, watching closely. The glaze will bubble, turn glossy, and start to caramelize—listen for that crackle.
- Keep a close eye to prevent burning. If the glaze starts to burn, lower the oven rack or cover with foil briefly. When the edges are deeply amber and sticky, it’s ready.
- Remove the ribs from the broiler. Let rest for 5 minutes to allow the juices to settle. Slice between the bones and serve immediately, with any remaining glaze spooned over.
- For that final crispy finish, give the ribs a quick flash under the broiler if needed—just a minute or two—until edges are crisp and shiny.
Let the ribs rest for 5 minutes after broiling. Slice between the bones, then serve immediately with any extra glaze drizzled over for maximum stickiness and shine.
How to Know It’s Done
- Glaze is deeply amber and sticky, with a glossy sheen.
- Edges are crispy and caramelized, with a crackling sound during broiling.
- Meat is tender and pulls easily from the bones when tested with a fork.
Sticky Caramelized Pork Ribs
Ingredients
Equipment
Method
- Preheat your oven to 150°C (300°F). Place the pork ribs in a large baking dish and trim excess fat if needed. Mix soy sauce, brown sugar, minced garlic, and apple cider vinegar in a small bowl to make your marinade.
- Rub the marinade all over the ribs, making sure to coat each bone and surface evenly. Let the ribs sit and absorb the flavors for at least 30 minutes, or overnight in the fridge for deeper flavor.
- Cover the baking dish tightly with aluminum foil and bake for about 2.5 to 3 hours. The meat should be tender and starting to pull away from the bones, filling your kitchen with a rich, savory aroma.
- Remove the ribs carefully from the oven and uncover. Mix honey into the remaining marinade to create a glossy glaze. Brush this generously over the ribs using a basting brush, coating all sides evenly.
- Transfer the ribs to a broiler-safe tray or keep them in the baking dish. Place under the broiler set to high, about 260°C (500°F), and cook for 3-5 minutes. Keep a close eye as the glaze bubbles and turns a deep amber, crackling softly as it caramelizes.
- Once the edges are crispy, deeply amber, and sticky with a glossy sheen, carefully remove the ribs from the broiler. Let them rest for 5 minutes to allow the juices to settle.
- Sprinkle sesame seeds over the ribs for a nutty crunch and visual appeal. Slice between the bones, serve immediately, and enjoy the irresistible combination of tender meat and crispy, caramelized edges.
Pro tips for sticky ribs
- Bolded mini-head: Use a sugar that melts evenly; brown sugar creates the best sticky glaze with rich caramel notes.
- Bolded mini-head: Apply the glaze generously after slow roasting; this ensures a glossy, sticky finish that crisps under the broiler.
- Bolded mini-head: Keep a close eye during broiling; the glaze can burn quickly, turning bitter if overdone.
- Bolded mini-head: For a deeper caramel flavor, brush on a second layer of glaze during the last minute of broiling.
- Bolded mini-head: Rest the ribs for at least 5 minutes before slicing; this helps juices redistribute and keeps the meat tender.
Common mistakes and how to fix them
- FORGOT to account for carryover heat; ribs can overcook if left too long under broiler.
- DUMPED the glaze directly on cold ribs; always apply after initial baking for even caramelization.
- OVER-TORCHED the edges; keep a close eye and remove when caramelized but not burnt.
- MISTOOK sticky for burnt; develop a visual cue of deep amber and a crackling sound to confirm readiness.
Quick fixes and pantry swaps
- When glaze shimmers and crackles, splash a splash of water to cool surface quickly.
- If glaze is too thick, warm it gently on the stove for a smoother brush.
- DUMPED sauce too early? Patch with a second layer during broil for extra stickiness.
- Over-torched edges? Shield with foil and lower broiler heat for gentle caramelization.
- When ribs aren’t sticky enough, brush with honey or maple syrup during the final broil for shine.
Prep, store, and reheat tips
- You can prep the ribs and apply the dry rub a day in advance. Wrap tightly and refrigerate overnight for deeper flavor.
- The cooked ribs can be stored in an airtight container in the fridge for up to 3 days. The glaze may thicken, but a quick reheat loosens it up.
- Reheat gently in the oven at 150°C (300°F) covered with foil, until warmed through and the glaze is sticky again—about 15-20 minutes. The aroma should be inviting and the surface slightly crackly.
- For longer storage, freeze the cooked ribs in a sealed container for up to 2 months. Thaw in the fridge overnight before reheating.
Top questions about sticky pork ribs
1. What kind of ribs should I choose?
Look for ribs with good marbling and a nice fat cap. It keeps the meat juicy and flavorful during slow roasting.
2. When should I add the glaze?
Apply the glaze during the last 10 minutes under the broiler. Watch closely; it can burn quickly, turning bitter and black.
3. How do I know when the ribs are done?
Cook the ribs until they’re tender and the meat starts to pull away from the bones, usually about 2.5–3 hours at 150°C (300°F).
4. How do I get that sticky finish?
Use a basting brush to coat the ribs generously with glaze. The sugar will melt and bubble, creating that sticky, glossy finish.
5. How do I prevent burning during broiling?
Broil on high and keep a close eye; the glaze can go from perfect to burnt in seconds. Remove once edges are deep amber and crackling.
6. Can I make these ahead?
Store cooked ribs in an airtight container for up to 3 days in the fridge. Reheat gently in the oven at 150°C (300°F) covered with foil.
7. My glaze is too thick, what do I do?
If the glaze is too thick, warm it gently on the stove with a splash of water or vinegar to loosen it up before applying.
8. How do I know when the ribs are cooked through?
Use a meat thermometer to check for an internal temperature of at least 75°C (165°F). The meat should be tender and juicy.
9. What if my ribs burn too quickly?
If the edges are over-torched, cover the ribs loosely with foil and lower the broiler heat to prevent further burning.
10. Can I add spices to the ribs?
For extra flavor, add a pinch of smoked paprika or chili powder to the dry rub for a smoky kick.
There’s something about that sticky, glossy crust that keeps drawing me back to this dish. It’s a messy, flavorful process that always feels like a small celebration in the kitchen. When those edges crackle under the broiler, I know I’ve nailed that perfect caramelized finish.
In a way, making these ribs is about more than just the eating. It’s about the joy of slow-building layers of flavor, the smoky aroma that fills the room, and the imperfect, satisfying mess of it all. That sticky bite sticks with me long after the plate is cleared.

Hi, I’m Hannah Reynolds, the heart behind Seasoning Therapist. I believe food can comfort, restore, and gently reset us after a long day. I started Seasoning Therapist with one simple idea in mind: cooking is not just about feeding the body, it is about caring for the mind too. The right seasoning can change the mood of a dish, and sometimes even the mood of the person eating it. This blog is where I combine my love for thoughtful cooking with my belief that the kitchen can be a place of healing.
