A turkey snack box might sound simple, but it’s surprisingly adaptable. It’s my go-to for busy mornings or quick outdoor lunches where I want something nourishing yet portable. Honestly, it’s become my little ritual—layering flavors, balancing textures, and feeling prepared even on chaos-filled days.
What I love most is how flexible this idea can be. You can swap ingredients based on what’s in the fridge or what you’re craving. Plus, it’s a no-fuss way to keep meals interesting without overthinking—just assemble and go, with the satisfaction of a well-rounded bite every time.
Focusing on how a simple turkey snack box can serve as a versatile, on-the-go meal that balances nutrition, flavor, and practicality—perfect for busy weekdays or spontaneous outdoor adventures.
The story behind this recipe
- This recipe came about one chaotic afternoon when I was trying to pack a lunch that wouldn’t fall apart or require reheating. I wanted something that felt fresh, satisfying, and could be thrown together in minutes. It’s a kind of organized chaos in my kitchen—finding what works when time is tight and appetite is big.
- I remember packing a similar box during a weekend hike, realizing how much I appreciated the simplicity of just grabbing a compact, balanced meal. That moment stuck with me, inspiring me to refine an idea that’s become my go-to for quick, nourishing bites on the fly.
- It’s a flexible concept that adapts to whatever I’ve got in the fridge, making each snack box unique.
- The act of assembling it feels almost meditative, a small act of control in busy days, with the promise of satisfying flavors in every bite.
Key ingredients for a balanced snack
- Turkey slices: I like mine thin and slightly smoked, but you can go thicker for more bite. Use what feels hearty to you, and watch for juiciness—dry turkey is sad. Try a quick splash of lemon juice on the slices for brightness.
- Cheese: I often choose a sharp cheddar or creamy havarti. They add a salty, melty contrast. Don’t be shy—layer it thick if you want that post-bite gooeyness, or thin for a subtle flavor boost.
- Fresh veggies: Crunchy cucumbers and crisp bell peppers are my staples, but radishes or carrots work too. Keep them chilled for maximum crunch, and slice thin for easy bites that don’t overwhelm the turkey.
- Dips & spreads: I lean towards a tangy mustard or a creamy hummus. They bring moisture and flavor. Use a bold mustard if you want a kick, or a mild one for balance. Smear generously or serve on the side.
- Snacks & extras: Nuts, dried fruits, or even a few olives can add texture and contrast. Toasted almonds or date slices are favorites. Keep these separate until serving to maintain their crunch and flavor integrity.
- Optional herbs: A sprinkle of fresh dill or basil can elevate the box. I love the aroma of herbs—just a little brightens everything up. Chop finely and scatter on top right before sealing.
- Base or grain: Sometimes I add a small handful of quinoa or a few crackers for substance. Choose something neutral that won’t overpower the other ingredients. It’s all about balancing textures and flavors in each bite.
Spotlight on key ingredients
Turkey and cheese:
- Turkey slices: I like mine thin and slightly smoked, but you can go thicker for more bite. Use what feels hearty to you, and watch for juiciness—dry turkey is sad. Try a quick splash of lemon juice on the slices for brightness.
- Cheese: I often choose a sharp cheddar or creamy havarti. They add a salty, melty contrast. Don’t be shy—layer it thick if you want that post-bite gooeyness, or thin for a subtle flavor boost.
Notes for ingredient swaps
- Dairy-Free: Swap cheese for avocado slices or a dairy-free cheese alternative. Expect a creamier, slightly different flavor profile.
- Gluten-Free: Use lettuce wraps instead of bread or crackers. Keeps it light and crisp, with fresh crunch in every bite.
- Low-Sodium: Choose unsalted turkey or rinse pre-seasoned meats. Be aware it might mellow the overall saltiness.
- Vegan: Replace turkey with marinated grilled tofu or tempeh. Adds a chewy, savory bite, but lacks the same juiciness.
- Nut-Free: Skip nuts and dried fruits, or substitute with crispy chickpeas or sunflower seeds. Keeps crunch intact without allergens.
- Spice Level: Add hot sauce or chili flakes for extra heat. Use sparingly if you prefer milder bites.
- Herbs & Flavors: Fresh dill or basil can be swapped with parsley or cilantro. Adjust according to your preferred aroma.
Equipment & Tools
- Medium skillet: For searing and cooking the turkey evenly.
- Sharp knife: To slice the cooked turkey cleanly.
- Cutting board: Provides a safe surface for prepping.
- Meat thermometer: Ensures the turkey is safely cooked to the right internal temperature.
Guide to Preparing the Turkey Snack Box
- Gather your equipment: a medium-sized skillet, a sharp knife, a cutting board, and a meat thermometer. The skillet is for cooking the turkey, the knife and board for prep, and the thermometer to check doneness.
- Preheat your skillet over medium heat, about 160°C (320°F), until just hot. Drizzle a bit of oil or butter if you like a golden crust.
- Pat the turkey breasts dry with paper towels; season with salt, pepper, and any preferred spices. This helps develop flavor and prevents steaming.
- Sear the turkey: Place the breasts in the skillet. Cook undisturbed for 4-5 minutes until the bottom is golden and releases easily. Flip and cook another 4-5 minutes, adjusting heat as needed.
- Check the internal temperature: Insert the meat thermometer into the thickest part of the breast. It should reach 74°C (165°F). If not, cover loosely with foil and finish cooking on low for a few more minutes.
- Once cooked, remove the turkey from the pan, tent loosely with foil, and let rest for 10 minutes. This allows juices to redistribute, ensuring moist slices.
- Slice the rested turkey against the grain into thin, even pieces. Serve immediately or pack into your snack box for later.
- Finish by arranging slices neatly in your snack box, adding complementary ingredients like cheese, veggies, or dips. Serve at room temperature or chilled.
Tent the sliced turkey lightly with foil and let rest for 10 minutes. This keeps the meat moist and flavorful. Then, layer slices into your snack box, adding your favorite sides and spreads.
How to Know It’s Done
- Turkey reaches 74°C (165°F) on a meat thermometer.
- Juices run clear when sliced.
- Surface is golden and slightly crispy, with a fragrant aroma.
Turkey Snack Box
Ingredients
Equipment
Method
- Preheat your skillet over medium heat until hot and aromatic. Carefully pat the turkey breast dry, then season lightly with salt and pepper.
- Place the turkey breast in the skillet and sear for about 4-5 minutes on each side, until the surface is golden brown and crispy. Use a meat thermometer to check that the internal temperature reaches 74°C (165°F).
- Once cooked, transfer the turkey to a cutting board, tent loosely with foil, and let rest for 10 minutes. This helps keep the meat moist and flavorful.
- Slice the rested turkey into thin, even strips against the grain, revealing a juicy, tender interior.
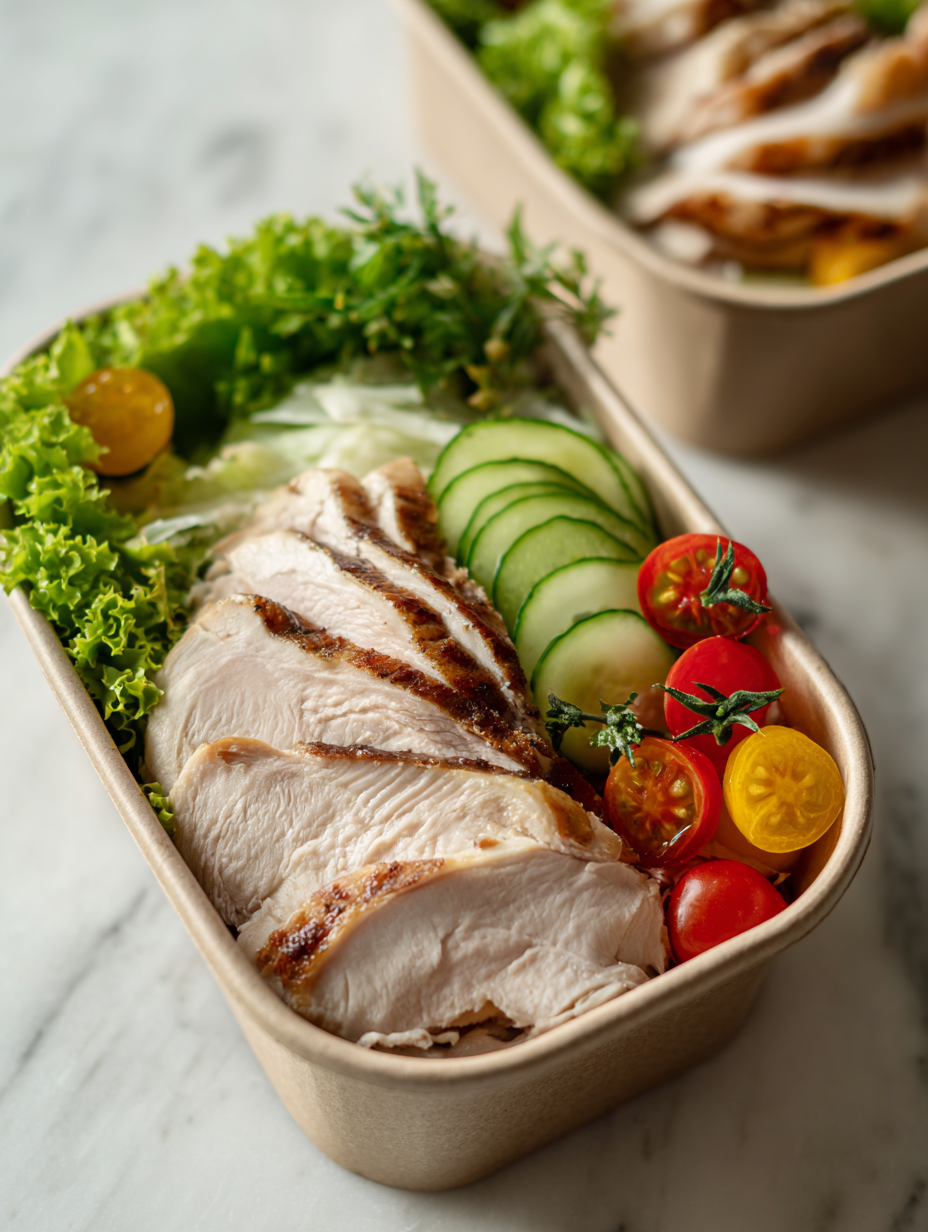
- Arrange the turkey slices in your snack box, layering with slices of cheddar cheese, crisp cucumber, and colorful bell peppers for a vibrant look.
- Add dollops of tangy mustard or hummus on the side or directly over the ingredients for moisture and flavor.
- Sprinkle fresh herbs and a handful of nuts or dried fruits over the top for added crunch and aroma.
- Seal the snack box and enjoy immediately, or refrigerate for up to 24 hours for a fresh, portable meal.
Notes
Pro tips for perfect turkey snack boxes
- Bolded mini-head: Use a hot skillet → Ensures a crisp, golden exterior on the turkey slices.
- Bolded mini-head: Keep slices thin → Makes for easier bites and quicker heat transfer during reheating.
- Bolded mini-head: Don’t overcrowd the pan → Maintains high heat for proper searing without steaming the meat.
- Bolded mini-head: Check internal temp → Remove at 74°C (165°F) for moist, perfectly cooked turkey.
- Bolded mini-head: Rest before slicing → Resting for 10 minutes helps retain juices, avoiding dry bites.
- Bolded mini-head: Add lemon juice → Brightens flavor and keeps turkey slices vibrant and juicy.
- Bolded mini-head: Layer ingredients thoughtfully → Creates a balanced, appealing snack box with contrasting textures.
Common mistakes and how to fix them
- USED TOO MUCH OIL: Keep it light to avoid greasy turkey. Wipe excess before searing.
- OVERCOOKED MEAT: Check internal temp at 74°C (165°F). Remove promptly to keep moistness.
- DONT REST TURKEY: Rest for 10 minutes to lock in juices and improve texture.
- SKIPPED GRAIN OR VEGGIES: For more texture, add a handful of toasted nuts or crunchy veggies.
Quick fixes and pantry swaps
- When in doubt, splash a touch of water to loosen stuck bits and shimmer the pan.
- If turkey dries out, patch with a quick drizzle of broth or lemon juice for moisture.
- Splash soy sauce or Worcestershire to add umami if your seasoning feels flat.
- When slices stick, shield with a non-stick spatula and gently lift to prevent tearing.
- Dumped too much oil? Wipe excess with a paper towel before searing again.
Prep, store, and reheat tips
- Prep your ingredients the night before—slice turkey, chop veggies, and portion spreads. The fridge will smell fresh and clean, making assembly quicker.
- Store cooked turkey slices in an airtight container for up to 3 days. Keep in mind, the meat might lose some juiciness over time, so reheat gently.
- Assemble the snack box just before eating for maximum freshness and crunch. If packing in advance, keep moist ingredients separate to prevent sogginess.
- Reheat turkey slices in a warm skillet or microwave until just heated through—look for a slight shimmer and a warm aroma. Overheating dries out the meat.
- Fruits, nuts, and cheeses are best kept sealed separately. Consume within 2-3 days for peak flavor, especially if they’re fresh or cut.
Top questions about Turkey Snack Box
1. Can I use pre-cooked turkey slices?
Yes, pre-cooked turkey slices work well and save time, just warm them slightly before packing.
2. Can I swap out the cheese?
Absolutely. Use your favorite cheese—cheddar, havarti, or even a soft goat cheese for variety.
3. Is it gluten-free?
Yes, swap in gluten-free crackers or lettuce wraps if you’re avoiding gluten for a lighter, fresher feel.
4. What vegetables work best?
Add sliced cucumbers, bell peppers, or radishes for crunch and freshness—keep them chilled for maximum crispness.
5. How long can I keep it in the fridge?
Store the assembled snack box in the fridge for up to 24 hours. For best texture, keep moist ingredients separate until serving.
6. How do I reheat leftovers?
Reheat turkey slices gently in a microwave or skillet until warm and slightly shimmering—avoid overcooking to prevent dryness.
7. How should I store the ingredients?
Use an airtight container to prevent moisture loss and keep ingredients fresh. Pack fruits and nuts separately to maintain crunch.
8. What if the turkey dries out?
If your turkey looks a little dry, add a squeeze of lemon or a drizzle of olive oil to boost moisture and flavor.
9. What kind of container should I use?
Choose a sturdy, compartmentalized container to keep ingredients separated and organized—makes packing and eating easier.
10. Can I add other spreads?
Feel free to customize with your favorite spreads, spicy mustard, or even a dollop of hummus for extra flavor.
This turkey snack box feels like a small act of rebellion against busy days—something I can put together quickly and still enjoy deeply. The familiar aromas of roasted turkey, sharp cheese, and crisp veggies remind me of simpler times, even as I tweak the ingredients to keep it fresh.
In the end, it’s these little, honest meals that keep me grounded—no fuss, just good flavors in a portable package. Sometimes, the best bites are the ones you assemble on the fly, with a little bit of care and a lot of taste.

Hi, I’m Hannah Reynolds, the heart behind Seasoning Therapist. I believe food can comfort, restore, and gently reset us after a long day. I started Seasoning Therapist with one simple idea in mind: cooking is not just about feeding the body, it is about caring for the mind too. The right seasoning can change the mood of a dish, and sometimes even the mood of the person eating it. This blog is where I combine my love for thoughtful cooking with my belief that the kitchen can be a place of healing.
