A simple paneer snack plate feels like a blank canvas, inviting all kinds of flavor experiments. I love how it can be both casual and a little fancy, depending on what I toss onto the platter. It’s perfect for when you want something filling but not heavy, and easy to share without fuss.
What makes this really interesting is how you can mix up textures and tastes—crisp, creamy, spicy, tangy—all on one plate. It’s like a little flavor adventure, right in your own kitchen. Plus, it’s a great way to use up leftover ingredients or to turn a humble block of paneer into something memorable.
Focusing on how a simple paneer snack plate can serve as a canvas for creativity, blending familiar flavors with unexpected pairings to transform an everyday ingredient into a vibrant, sharable experience.
The story behind this recipe
- This snack plate idea came from a lazy weekend afternoon, when I had a block of paneer and a handful of leftovers that needed using up. I wanted something that felt casual but still fresh, with a bit of zing and crunch. Somehow, throwing together a platter turned into a little experiment in balancing textures and flavors, which I kept coming back to.
- It’s a dish born out of the chaos of my kitchen—no strict rules, just what’s around and what feels good to nibble on. I love how it makes me feel like a kid again, just reaching into the fridge and putting together whatever I find. That spontaneous vibe keeps it fun, and it’s become my go-to for easy gatherings or solo munching.
- heading
- story_type
Key ingredients and tips
- Paneer: I like it firm and slightly squeaky, with a mild milky flavor that’s perfect for grilling or pan-frying. Swap it for tofu if you want a softer bite, but keep in mind it won’t have that chewy texture.
- Chili powder: I always go light here, just enough to give a gentle heat. If you prefer more punch, add a pinch more—just beware, it sneaks up. For milder heat, use paprika instead for smokiness without the spice.
- Lemon: Brightens everything up, makes the paneer pop. I squeeze it just before serving for that zesty punch. Skip it if you’re out, but your dish might feel a bit flat without that fresh tang.
- Cilantro: I love the herb’s fresh, grassy aroma, especially when sprinkled right before plating. If you dislike cilantro, basil or mint can bring a different kind of freshness without the soapiness.
- Yogurt: Creamy and cooling, it balances the spice and adds richness. Use Greek yogurt for thickness or plain regular yogurt if you want a lighter touch. A dollop right on the plate feels indulgent but still simple.
- Assorted Veggies: I keep it crunchy with bell peppers and radishes, adding color and texture. Feel free to toss in cherry tomatoes or cucumber for more freshness—just slice them thin so they don’t overwhelm the paneer.
- Spices & Seeds: I sprinkle cumin seeds or black sesame for a nutty aroma. Toasting them slightly on the pan releases a warm, toasted scent that really elevates the dish. Skip if you want to keep it super simple.
Spotlight on key ingredients
Paneer:
- I love it firm and slightly squeaky, with a mild milky flavor that holds up well when grilled or fried. Swap for tofu if you prefer a softer bite, but it won’t have the same chewy texture.
- Chili powder: I keep it gentle here, just enough to warm up the palate. If you want more heat, add a pinch more—be cautious, it sneaks up. For a smokier, milder flavor, paprika works beautifully.
Lemon and herbs:
- Lemon: Brightens up the dish instantly, making the paneer pop. I squeeze it right before serving for that fresh, zingy punch. If you’re out, a splash of vinegar can add a similar tang, but it won’t be quite the same.
- Cilantro: I love its grassy aroma and vibrant green color, especially sprinkled just before plating. If cilantro isn’t your thing, basil or mint provide a fresh alternative without the soapy aftertaste.
Notes for ingredient swaps
- Dairy-Free: Use firm tofu instead of paneer for a similar texture, but keep in mind it won’t have the same milky flavor.
- Vegan Yogurt: Swap regular yogurt for coconut or almond yogurt for a dairy-free, tangy alternative with a hint of sweetness.
- Spice Level: Replace chili powder with smoked paprika for a milder, smoky flavor that still adds warmth.
- Fresh Herbs: Basil or mint can replace cilantro if you prefer a different herbal note or dislike cilantro’s flavor.
- Citrus: Lime juice can stand in for lemon for a slightly different brightness and zing, especially if you want a more tart punch.
Equipment & Tools
- Non-stick skillet: For even browning and easy flipping of paneer.
- Sharp knife: To cut paneer cleanly into even pieces.
- Small bowl: To mix spices and lemon juice.
- Spatula: To flip and handle paneer without breaking.
Step-by-step guide to paneer snack plate
- Equipment & Tools: Gather a non-stick skillet (for even browning), a sharp knife (for clean cuts), a small bowl (for mixing spices), and a spatula (for flipping).
- Preheat your skillet over medium heat (~160°C / 320°F) until warm and just starting to shimmer.
- Cut the paneer into 1.5 cm (0.6 inch) thick slices or cubes, depending on your presentation preference.
- In the small bowl, mix spices: chili powder, cumin seeds, a pinch of salt, and a squeeze of lemon juice. Set aside.
- Add a tablespoon of oil to the skillet. When shimmering, place paneer pieces in a single layer. Cook for 3-4 minutes each side until golden and slightly crispy around the edges.
- a. Use the spatula to gently flip the paneer, ensuring even browning. b. Check for a golden crust and a slight squeak when pressed. c. If sticking occurs, lift gently and add a touch more oil.
- Sprinkle the spice mixture over the hot paneer while still in the pan, allowing the flavors to cling and toast gently for 30 seconds.
- Remove paneer from heat. Let it rest for 2-3 minutes to settle and develop richer flavor.
- Plate the paneer with a dollop of yogurt, fresh herbs, and sliced vegetables as desired. Squeeze fresh lemon over before serving.
- Final check: the paneer should be golden and crispy, the spices fragrant, and the yogurt slightly set around the edges.
Let the paneer rest for 2-3 minutes off heat. Serve immediately with yogurt, herbs, and vegetables. Squeeze lemon just before eating for that bright zing.
How to Know It’s Done
- Paneer has a golden crust with slight squeak when pressed.
- Spice mixture is toasted and fragrant, not burnt.
- Yogurt is creamy and slightly thickened around the edges.
Paneer Snack Plate
Ingredients
Equipment
Method
- Gather all your tools: a non-stick skillet, a sharp knife, a small bowl, and a spatula.
- Preheat the skillet over medium heat until it’s warm and begins to shimmer slightly, ready for frying.
- Cut the paneer into 1.5 cm (about 0.6 inch) thick slices or cubes, depending on your preference for presentation.
- In the small bowl, mix chili powder, toasted cumin seeds, a pinch of salt, and squeeze in the lemon juice to make a flavorful spice mixture.
- Add a tablespoon of oil to the skillet. When it’s shimmering, gently place the paneer pieces in a single layer in the hot pan.
- Cook the paneer for about 3-4 minutes on each side, until golden brown and slightly crispy around the edges. Use the spatula to flip carefully, listening for a gentle sizzle and watching for even browning.
- Sprinkle the prepared spice mixture over the hot paneer, allowing the spices to toast slightly and cling to the surface for about 30 seconds.
- Remove the paneer from the skillet and let it rest for 2-3 minutes to settle and develop a richer flavor.
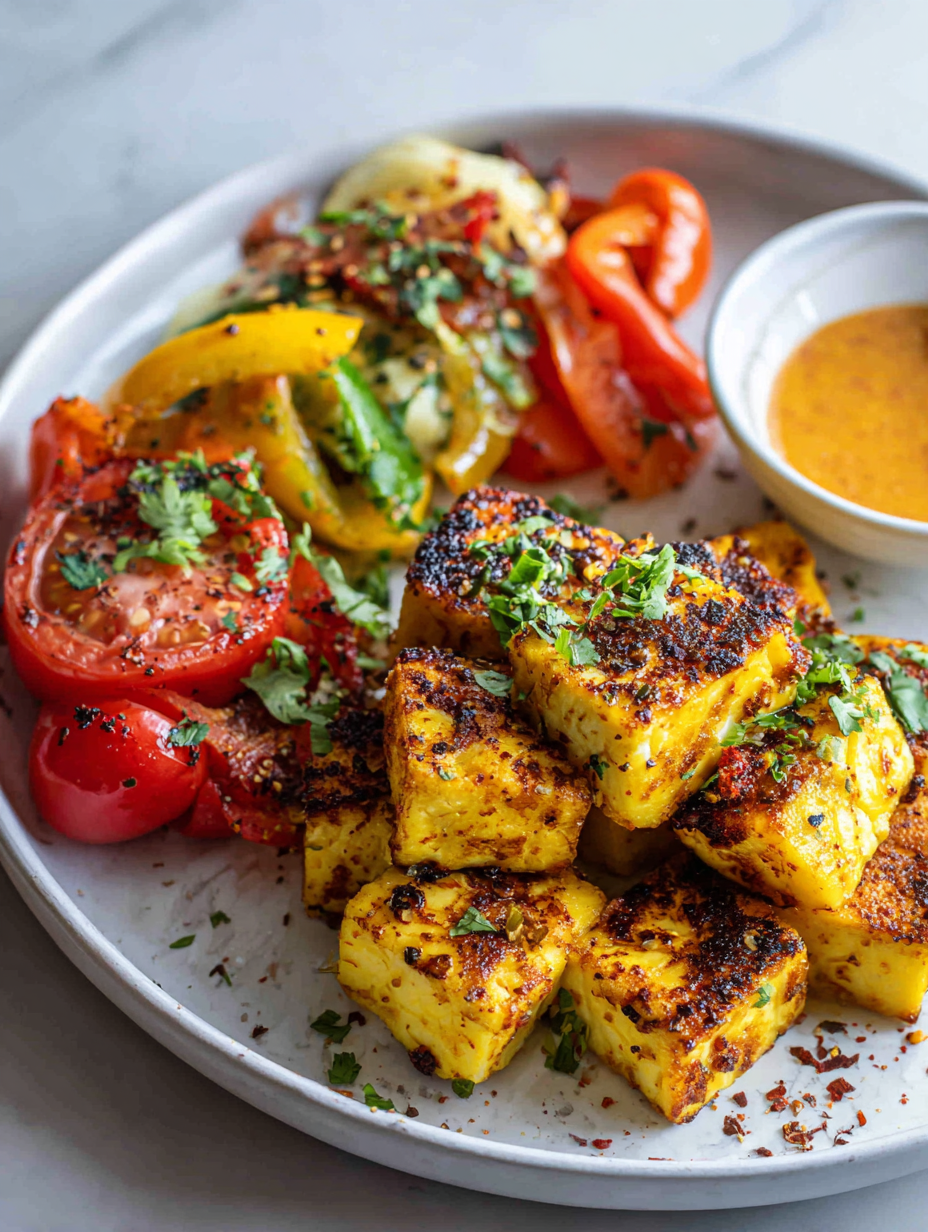
- Plate the paneer alongside sliced bell peppers and radishes for color and crunch. Add a dollop of yogurt on the side and sprinkle fresh cilantro over everything.
- Squeeze fresh lemon juice over the paneer and vegetables just before serving to brighten the flavors and add a zesty punch.
Notes
Pro tips for perfect paneer
- Use high heat: Sear the paneer quickly to get a crispy crust without drying out the inside.
- Pat dry before frying: Remove excess moisture to prevent splatters and ensure a golden exterior.
- Toast spices gently: Keep a close eye and smell for toasted aroma, not burnt, for maximum flavor.
- Flip carefully: Use a wide spatula to turn paneer gently, avoiding breakage and ensuring even color.
- Squeeze lemon at the end: Adds bright freshness and prevents the paneer from becoming soggy too early.
- Rest before serving: Let cooked paneer sit for a couple of minutes so flavors settle and texture firms up.
- Finish with fresh herbs: Sprinkle right before serving for maximum aroma and vibrant color.
Common mistakes and how to fix them
- FORGOT to dry the paneer before cooking → Results in less crispy edges, pat dry first.
- DUMPED too much oil in the pan → Use a light coating to avoid greasiness and soggy paneer.
- OVER-TORCHED the spices → Toast gently, smell should be toasted, not burnt.
- MISSED resting time for paneer → Rest for 2-3 minutes for better flavor absorption and texture.
Quick fixes and pantry swaps
- When burnt spices → Splash cold water to stop the charring.
- If paneer sticks → Patch with a little oil and gentle flipping.
- DUMPED too much oil → Use a paper towel to blot excess oil quickly.
- OVER-TORCHED the paneer → Shield with a lid and reduce heat immediately.
- Splash lemon late → Add a squeeze now for bright flavor and shimmer.
Prep, store, and reheat tips
- Pre-cut paneer into cubes or slices a day ahead; keep in an airtight container in the fridge. It firms up slightly, making it easier to fry or grill fresh.
- Prepare spice mix and squeeze lemon juice in advance; store separately in small jars. Flavors meld better when they sit for a few hours.
- Assemble vegetables and herbs in a container, washed and sliced. Keep crisp and vibrant by storing in a sealed bag with a paper towel to absorb moisture.
- Paneer leftovers can be refrigerated up to 2 days. For reheating, pan-fry on medium until crispy and warmed through, about 2-3 minutes per side. Watch for slight aroma of toasted spices.
- Refrigerated flavors dull slightly after a day. Brighten with a fresh squeeze of lemon or herbs just before serving for that lively pop.
Top questions about paneer snack plate
1. Can I use tofu instead of paneer?
Use firm, squeaky paneer that holds up when cooked. Soft or crumbly paneer won’t get that nice crust.
2. How do I make this vegan?
Yes, but tofu will be softer and less chewy. Press out excess moisture first for better crispiness.
3. What if I want it less spicy?
Add more chili or spices if you like it spicy. For milder flavor, use paprika or reduce the chili powder.
4. How do I reheat leftovers?
Serve immediately for the best crunch. Reheat in a hot pan for 2-3 minutes to refresh the texture.
5. Can I skip the lemon?
Use fresh lemon juice for brightness. Squeeze just before serving so it doesn’t make the paneer soggy.
6. What herbs work best instead of cilantro?
Yes, basil or mint can replace cilantro for a different fresh flavor profile.
7. What vegetables should I add?
Slice vegetables thin for crunch and freshness. Cherry tomatoes or cucumber add nice contrast.
8. How do I know when spices are toasted?
Keep spices toasting until fragrant but not burnt. Smell for a warm, toasted aroma—about 30 seconds.
9. How do I flip the paneer without breaking it?
Use a wide spatula to flip paneer gently. It prevents breaking and ensures even browning.
10. Why is my paneer not getting crispy?
Pat dry the paneer before frying to get a crispy crust and reduce splatters.
This paneer snack plate isn’t just about quick bites; it’s a canvas for improvisation and personal touches. The crunch of toasted paneer and the brightness of fresh herbs make every bite feel lively and satisfying. It’s a reminder that simple ingredients can come together in unexpected ways.
In times when I crave something familiar yet fresh, this plate hits the spot. It’s perfect for casual gatherings, quiet nights, or just a spontaneous craving. No matter how often I make it, it always feels like a small celebration of flavors in my own kitchen.

Hi, I’m Hannah Reynolds, the heart behind Seasoning Therapist. I believe food can comfort, restore, and gently reset us after a long day. I started Seasoning Therapist with one simple idea in mind: cooking is not just about feeding the body, it is about caring for the mind too. The right seasoning can change the mood of a dish, and sometimes even the mood of the person eating it. This blog is where I combine my love for thoughtful cooking with my belief that the kitchen can be a place of healing.
